Taking Forensic Collections
Service Collection
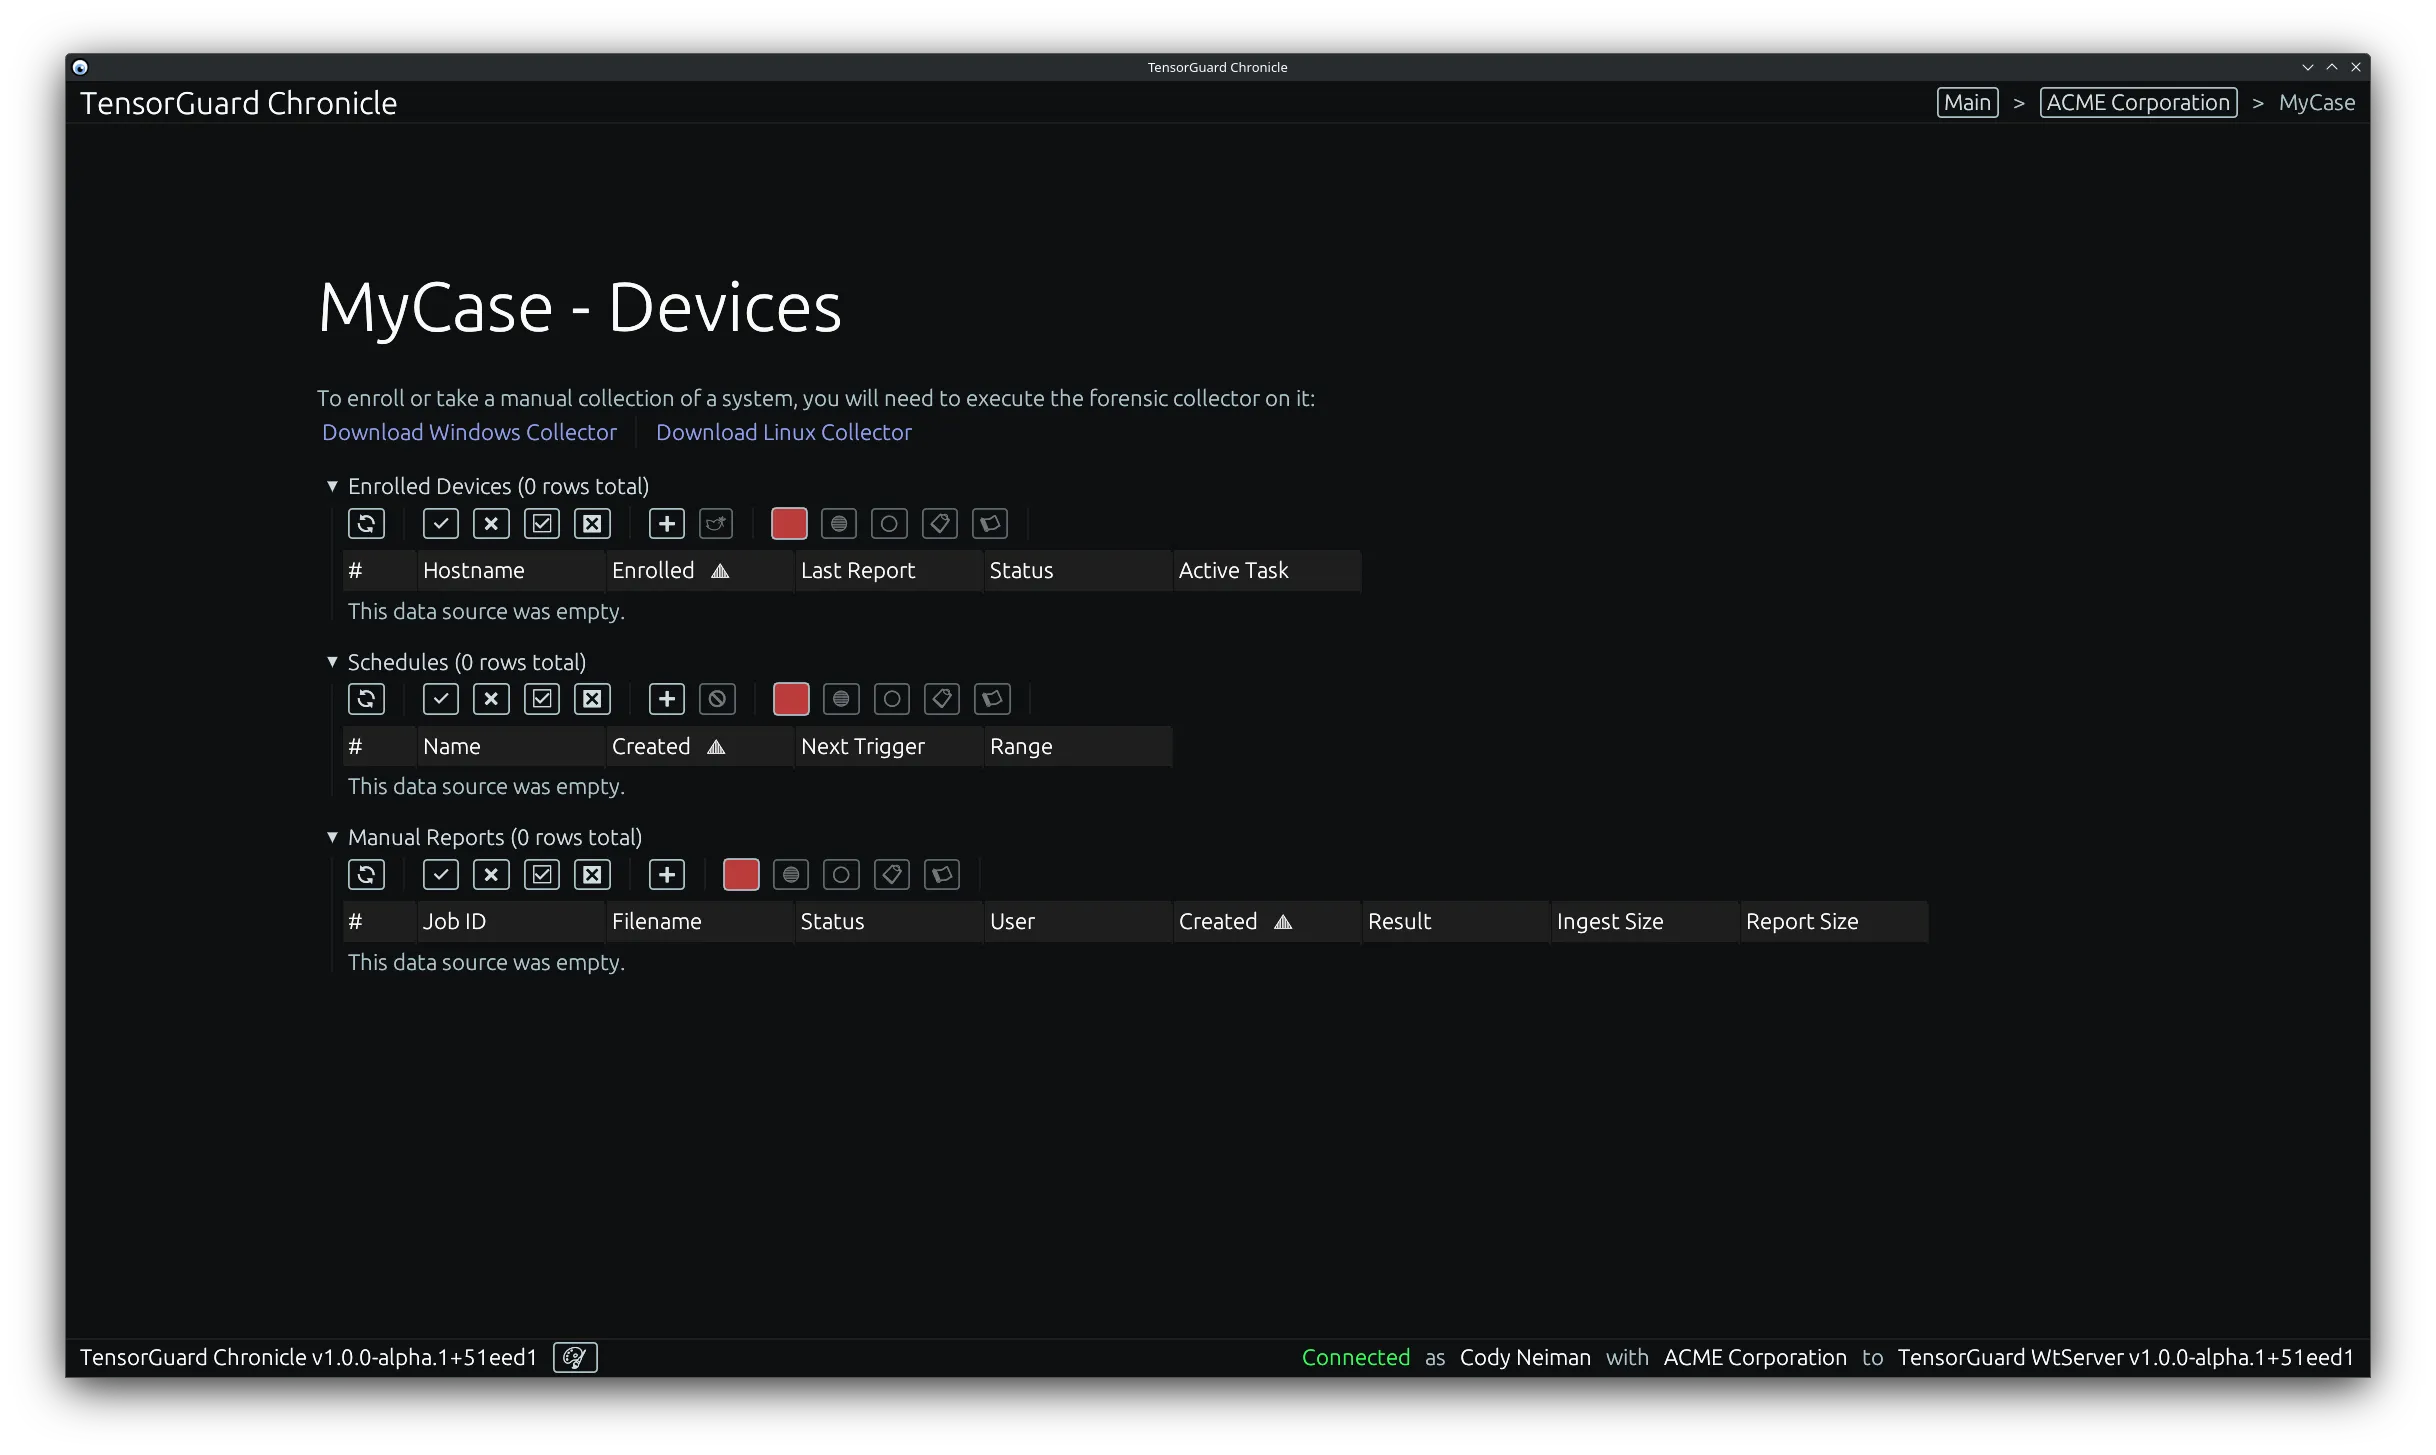
Section titled “Service Collection”Registering a Device
Section titled “Registering a Device”Graphical User Interface (GUI)
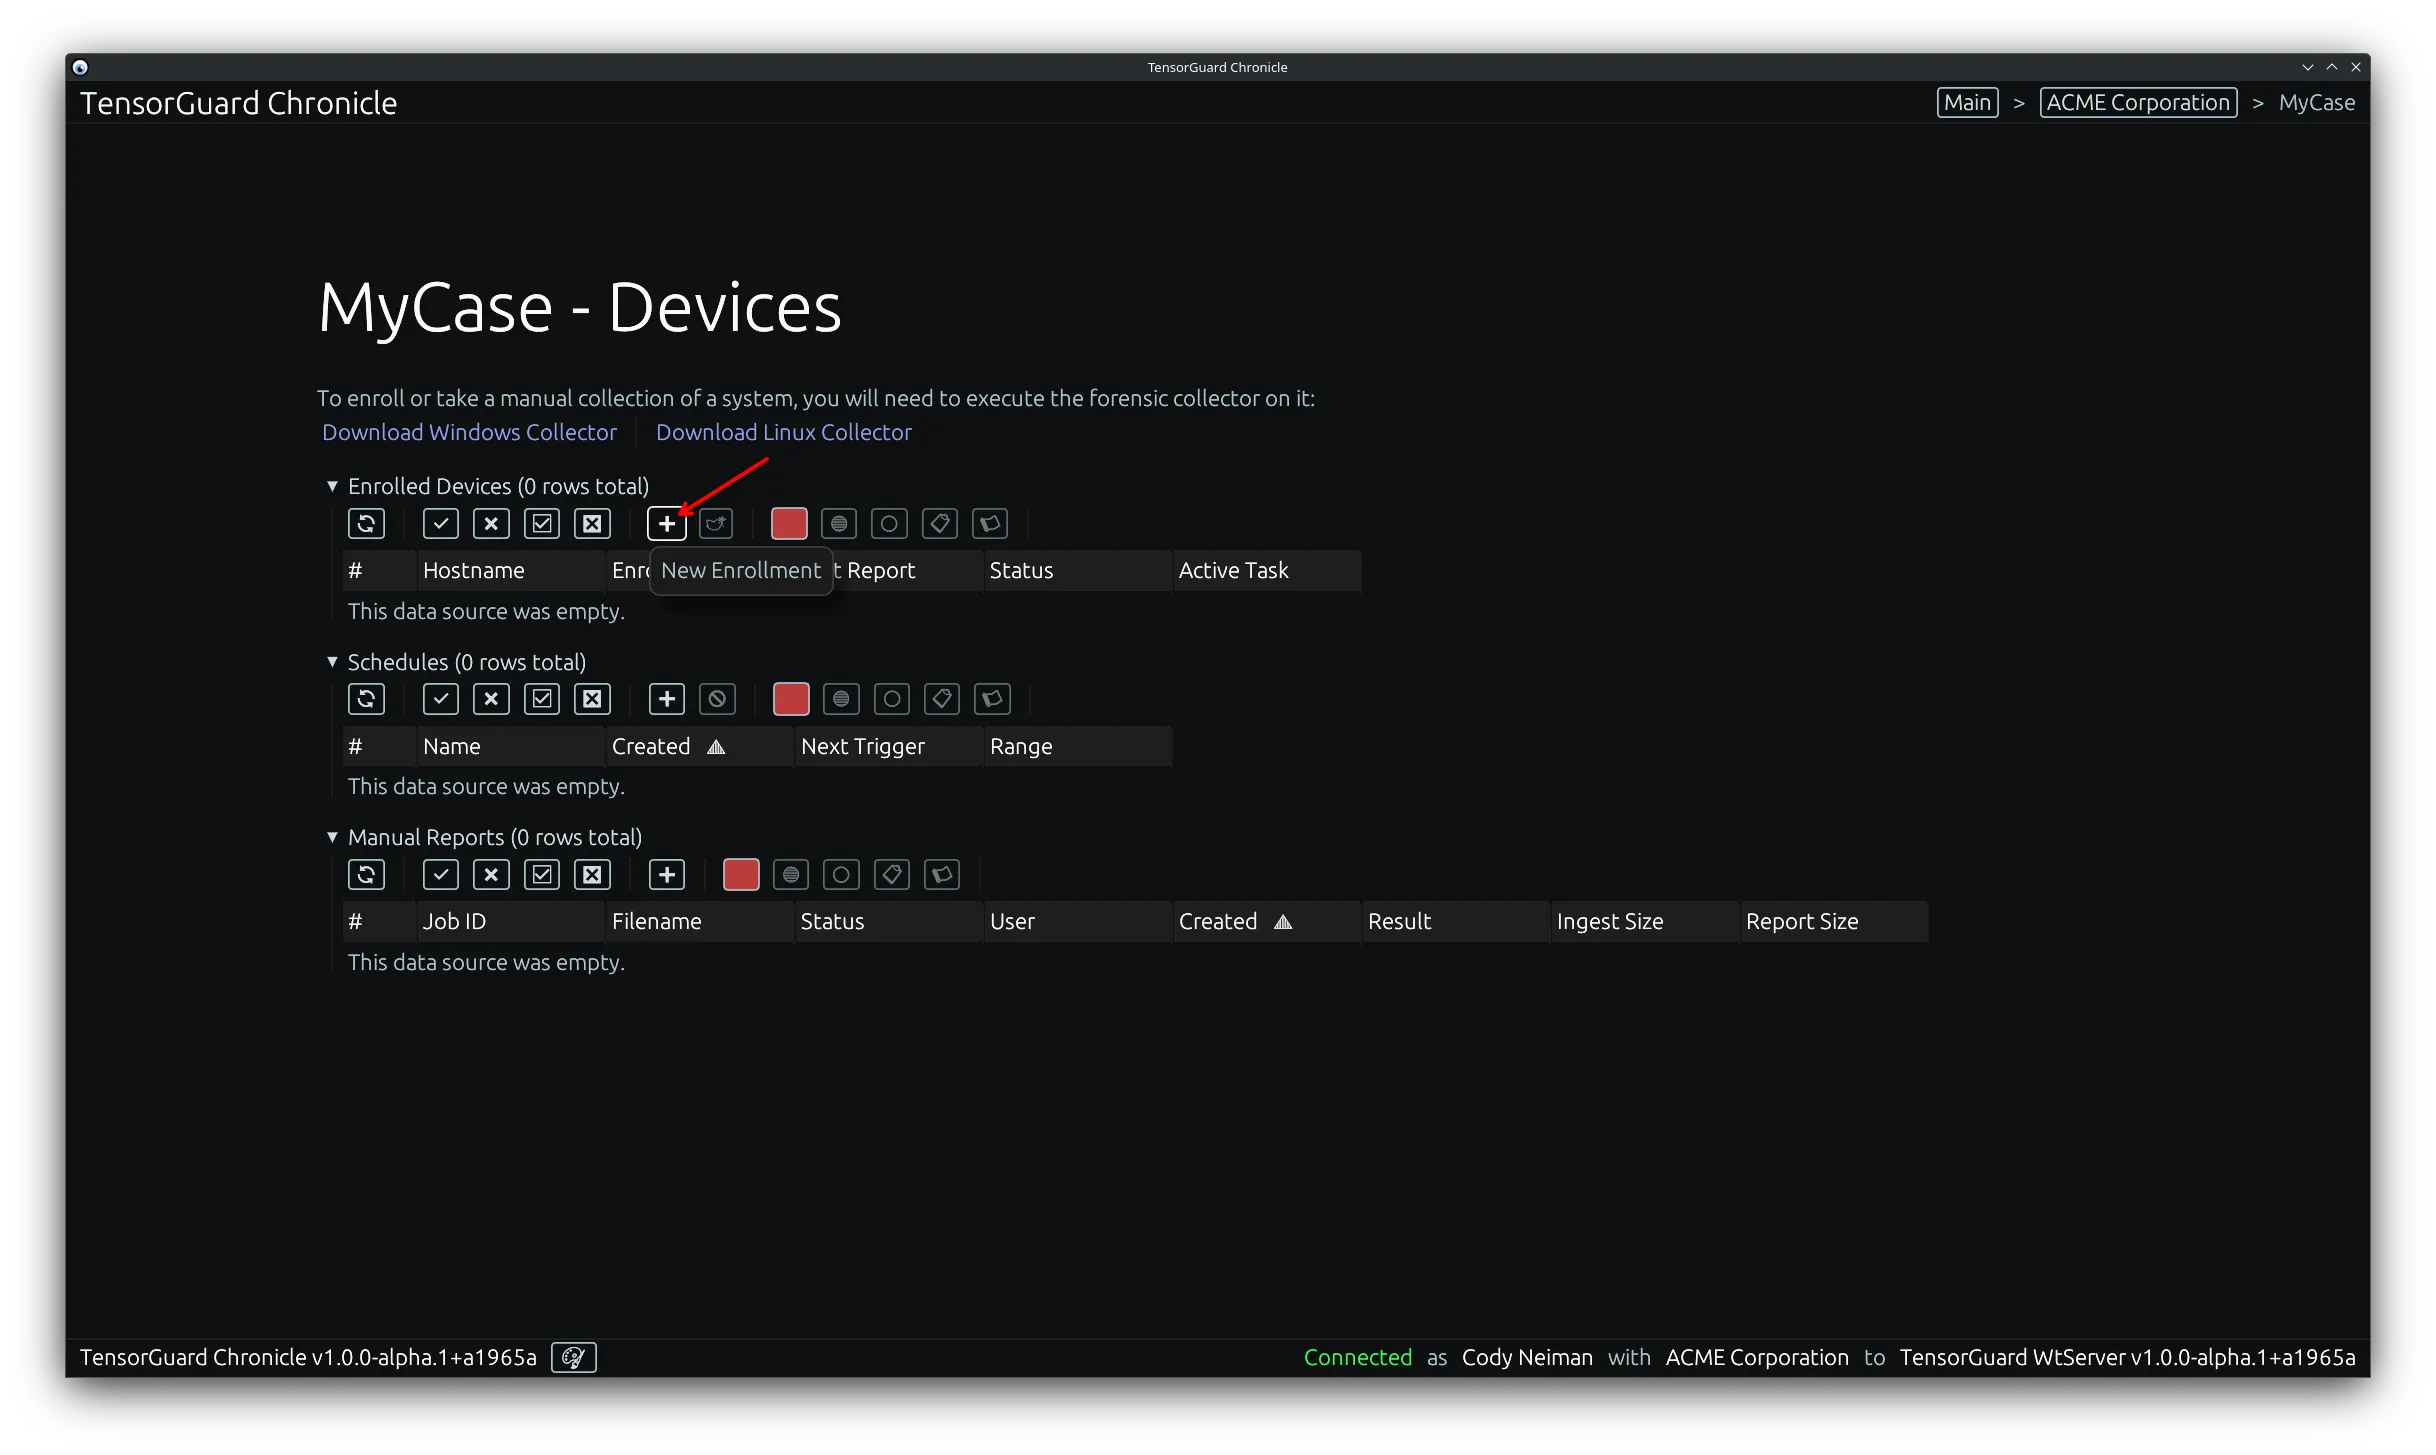
Section titled “Graphical User Interface (GUI)”- From the case menu, select the “New Enrollment” tool in the “Enrolled Devices” table.
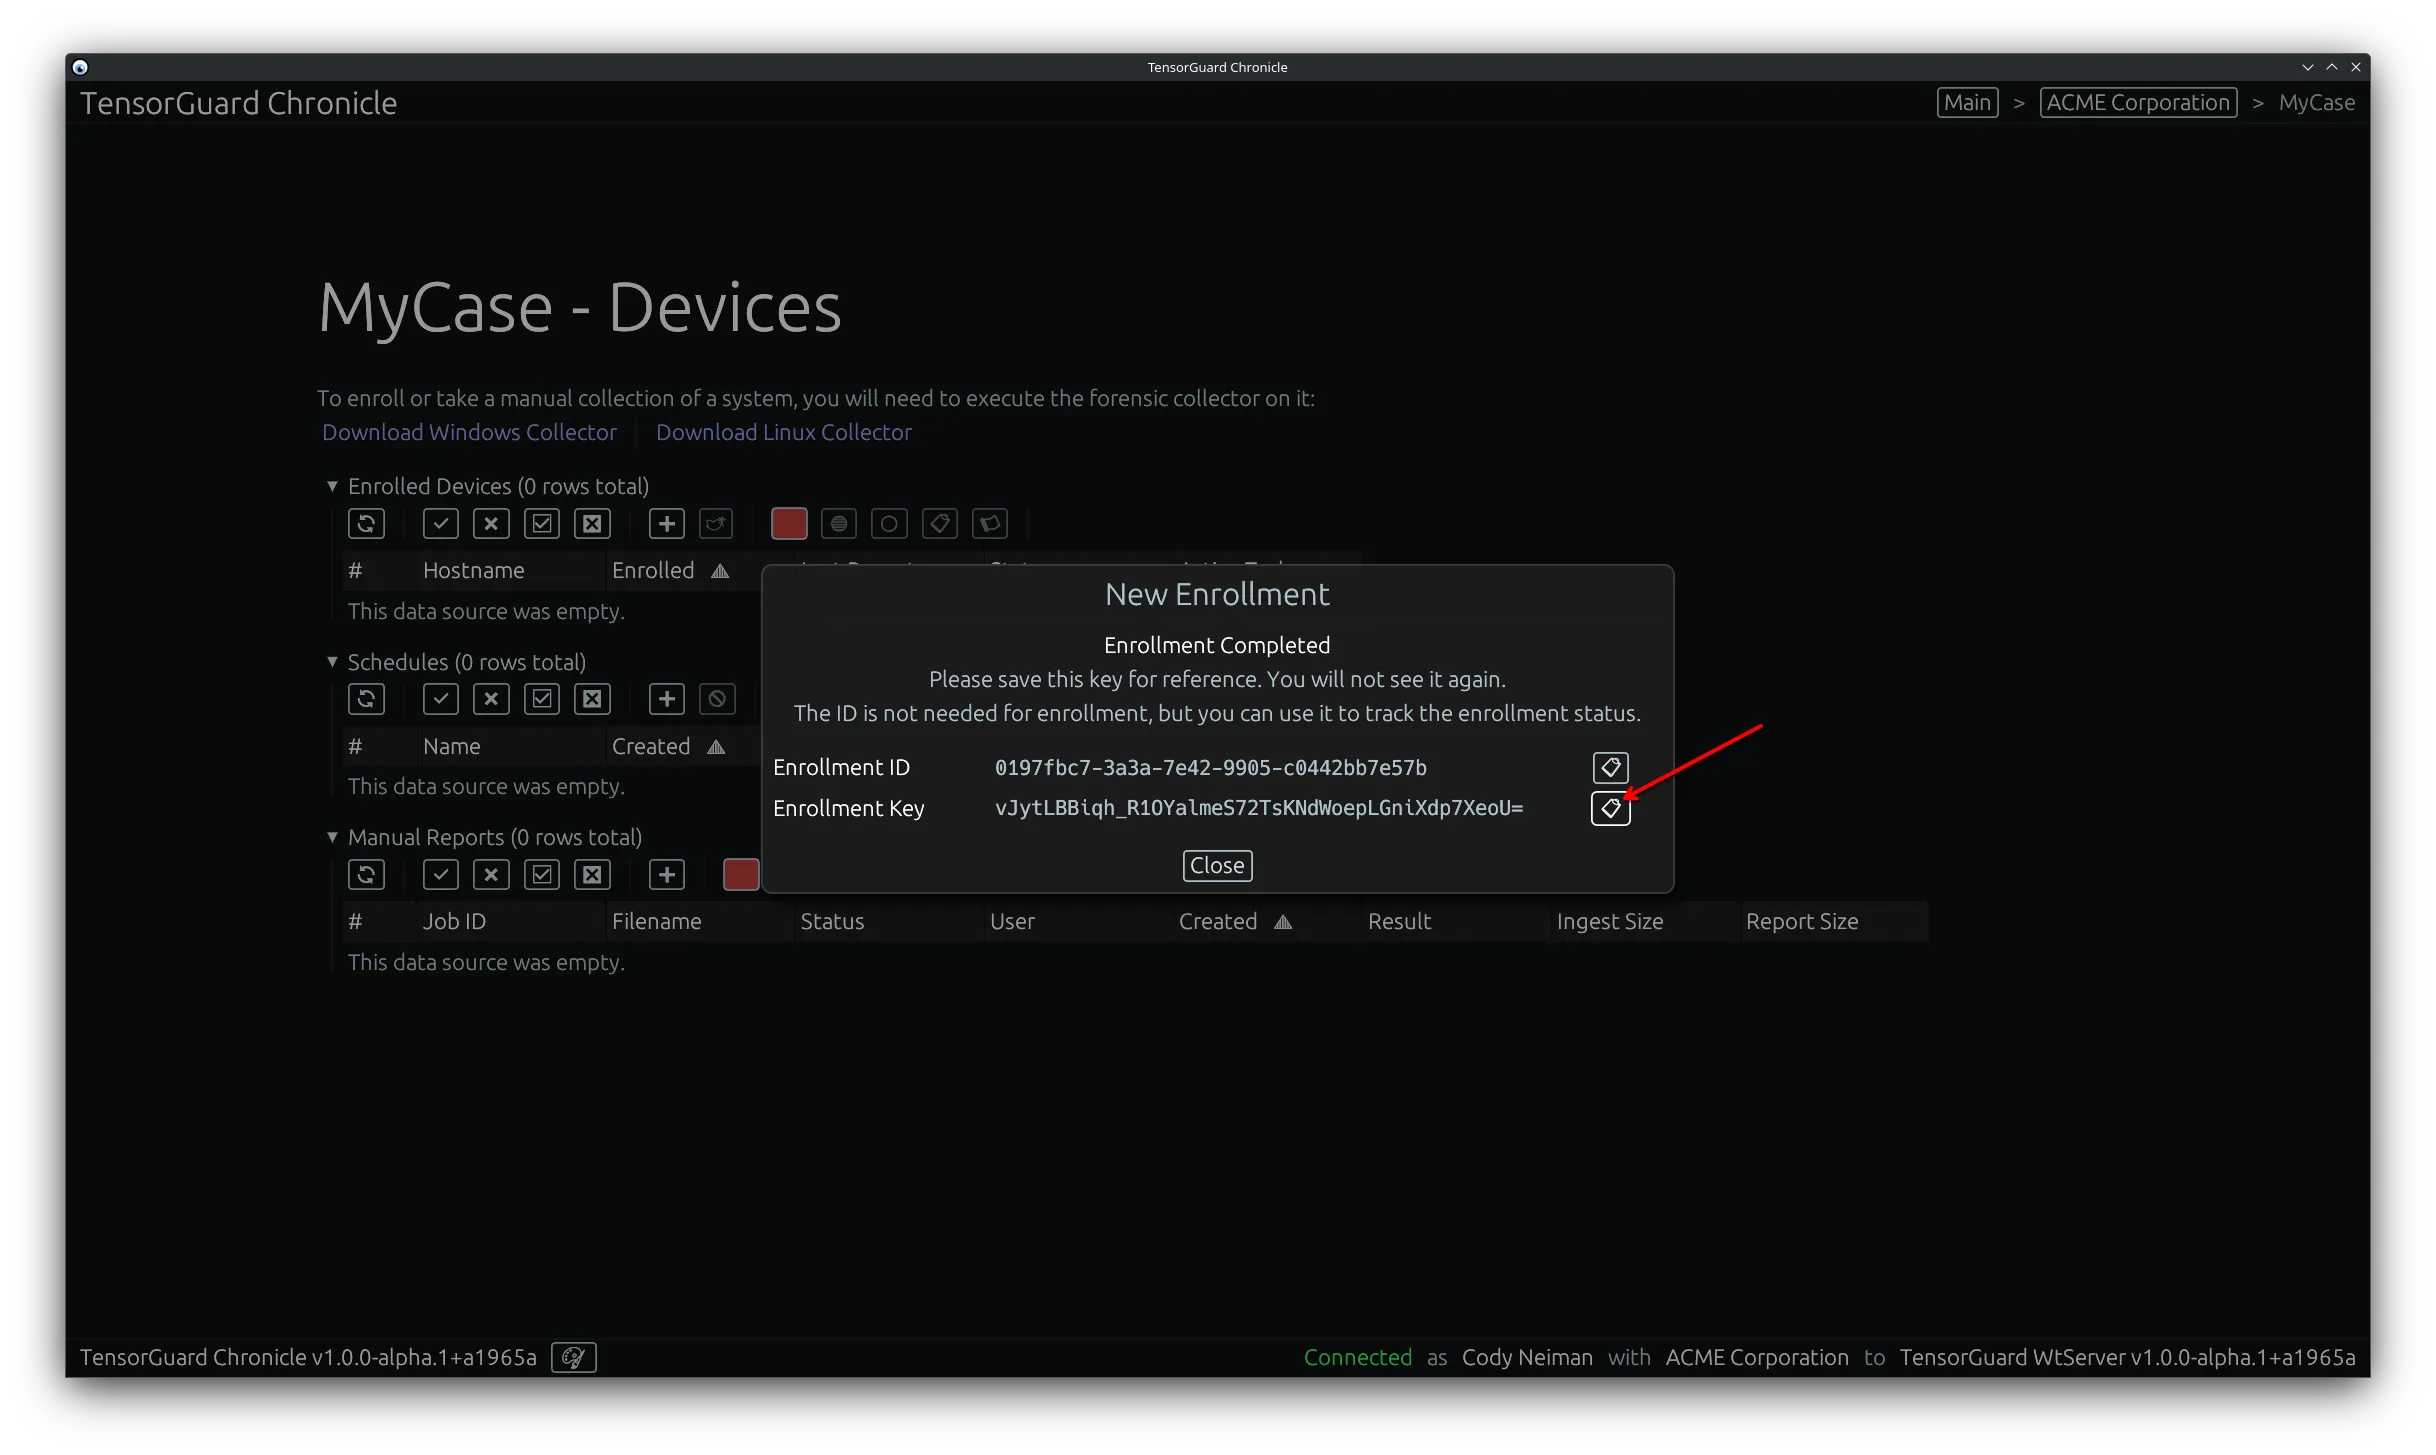
- Copy the “Enrollment Key” and select close. This will only be shown once. The enrollment key is required on the device to register it to your case.
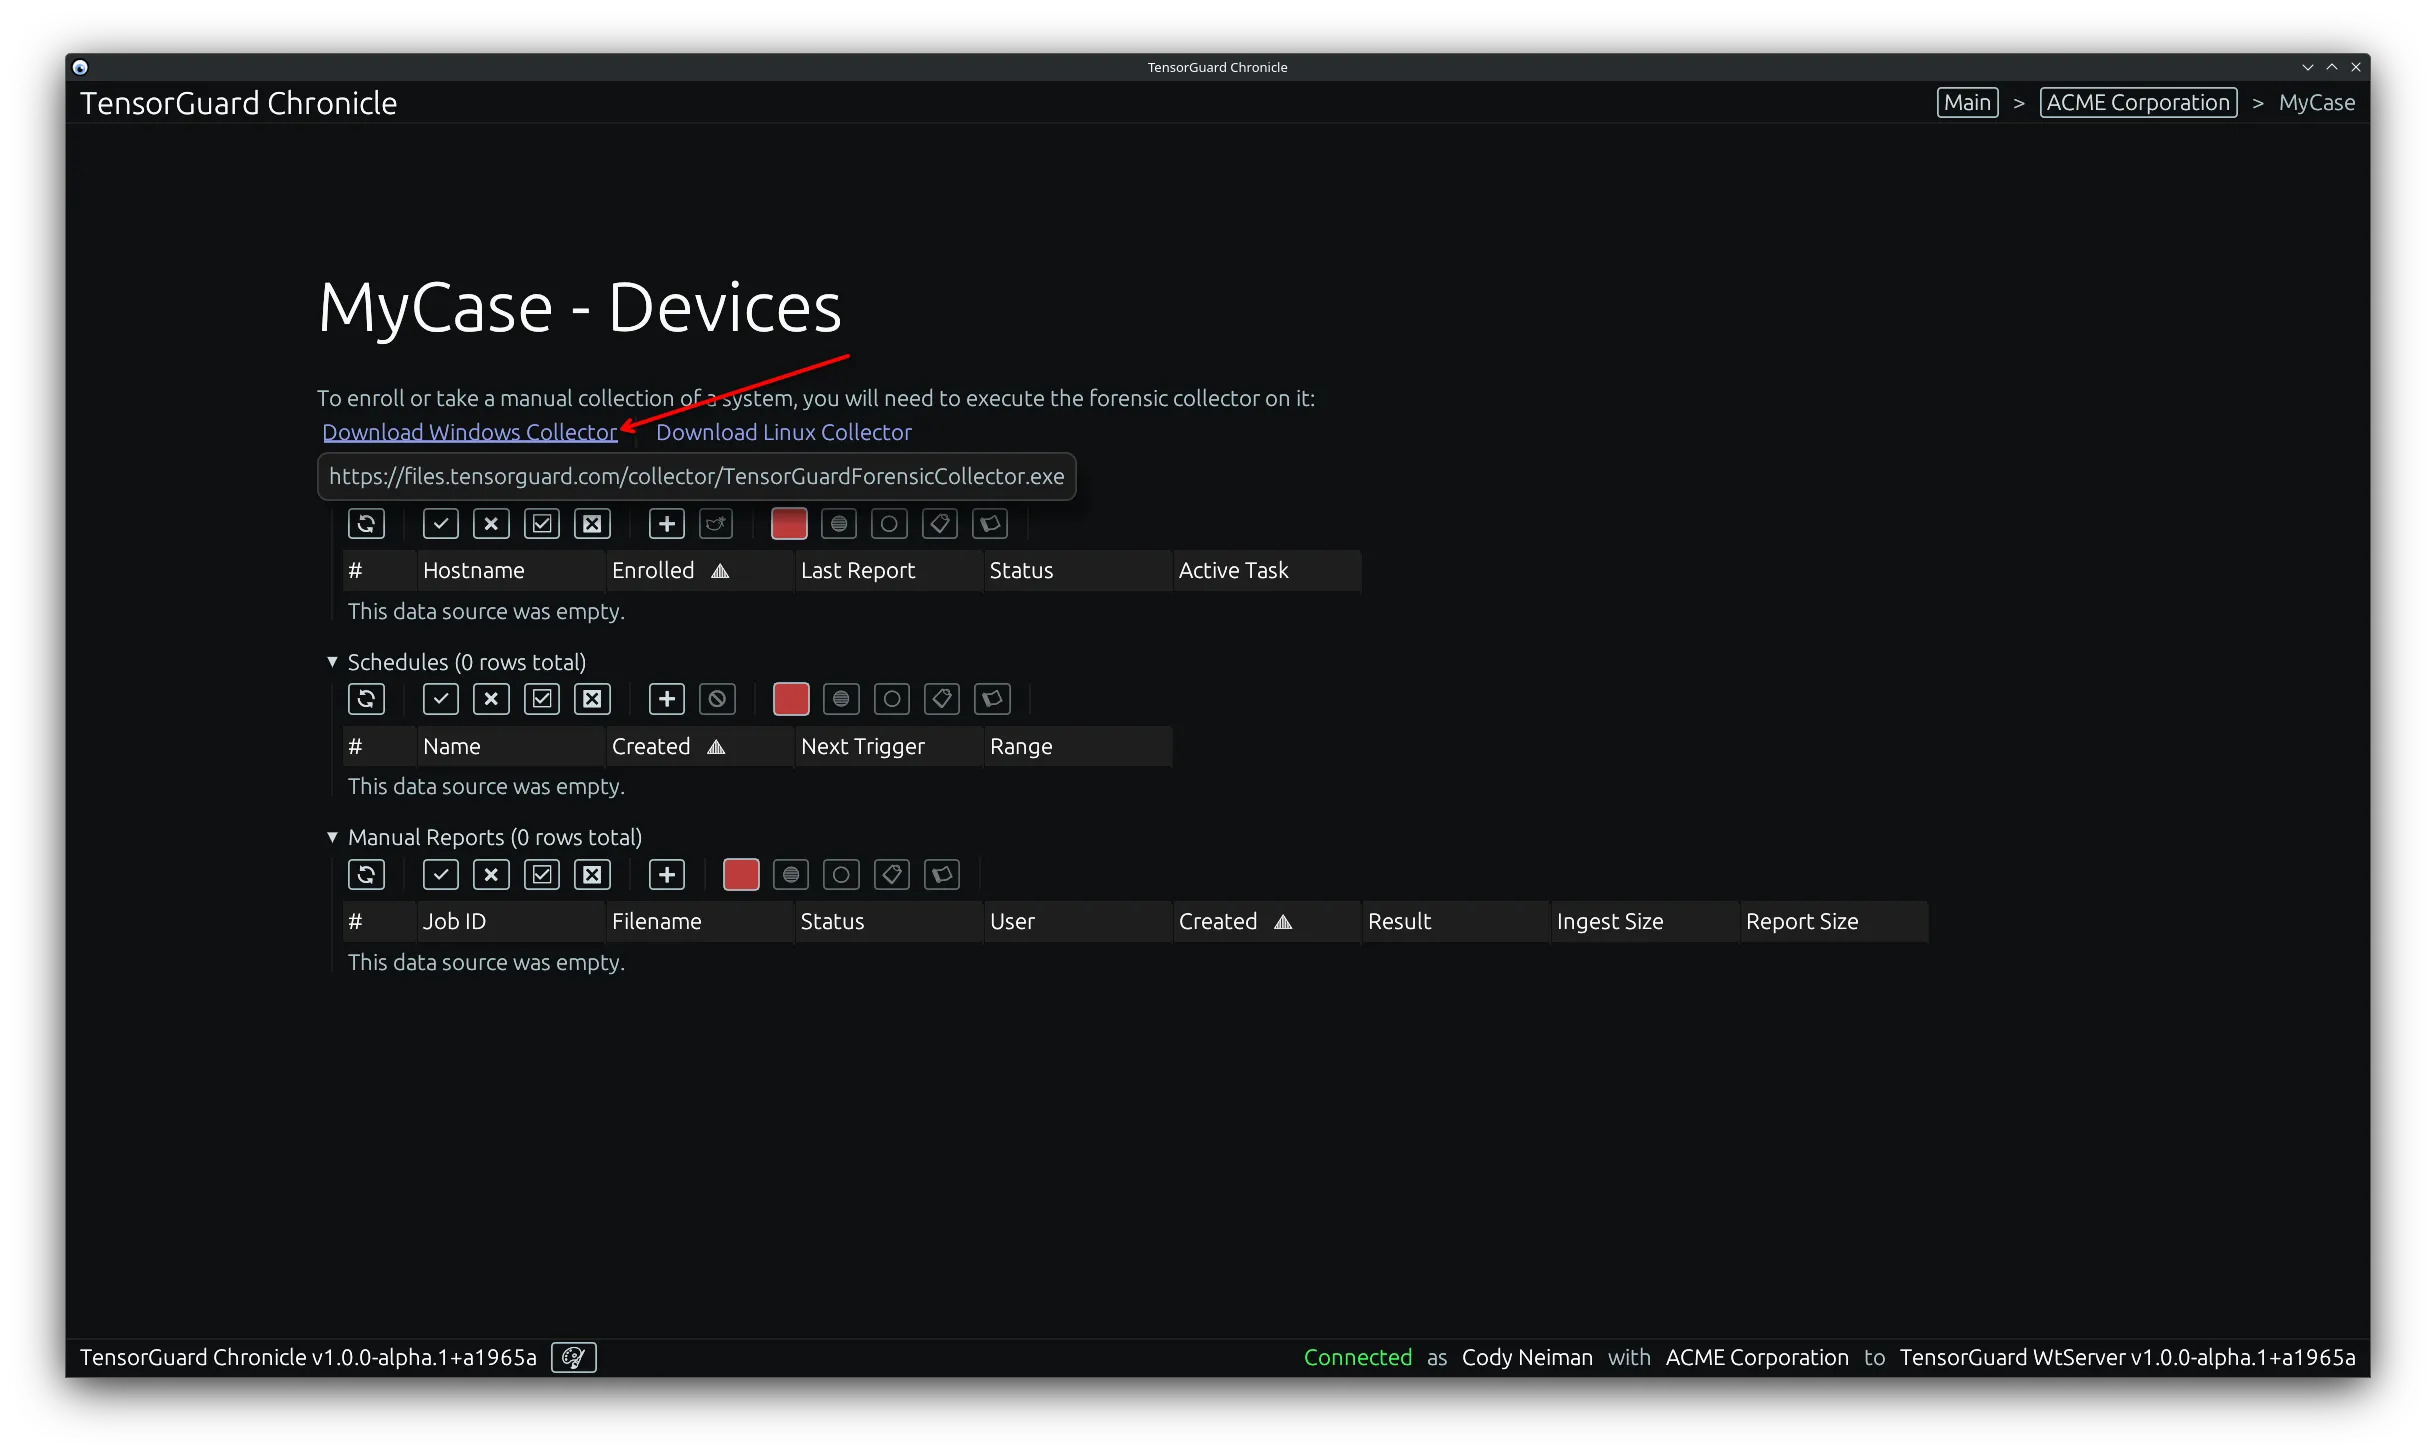
- Click “Download Windows Collector” or “Download Linux Collector” based on the target device that you want to register. These same downloads are linked here: Downloads.
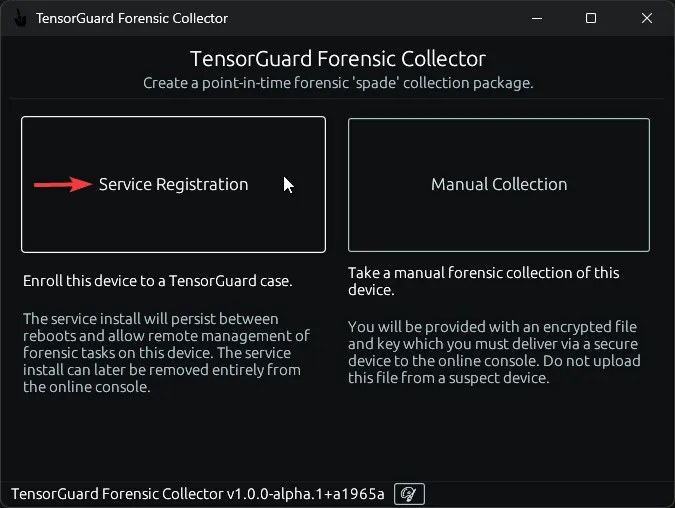
- Execute the collector program on your target device. Choose “Service Registration”. You must run it as administrator on Windows, or a sudo-user on Linux.
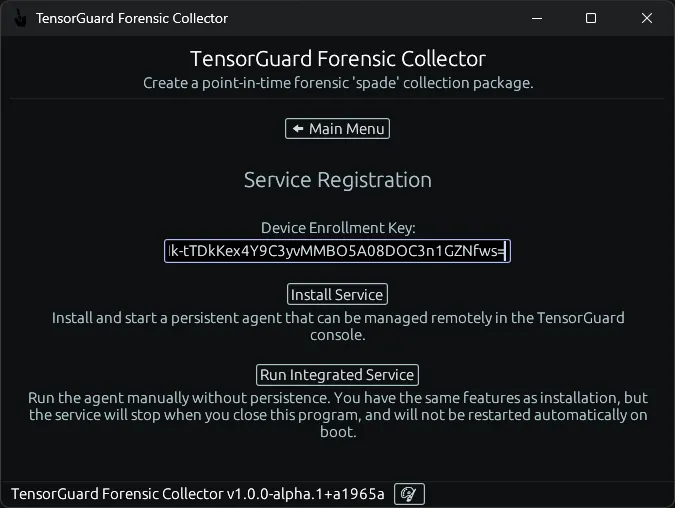
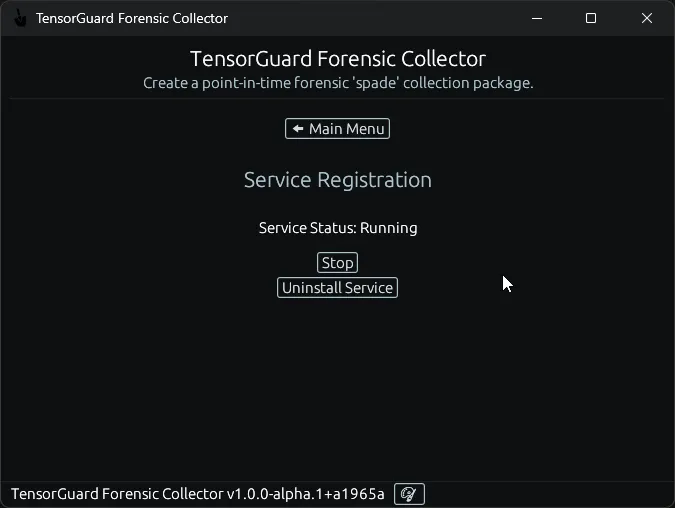
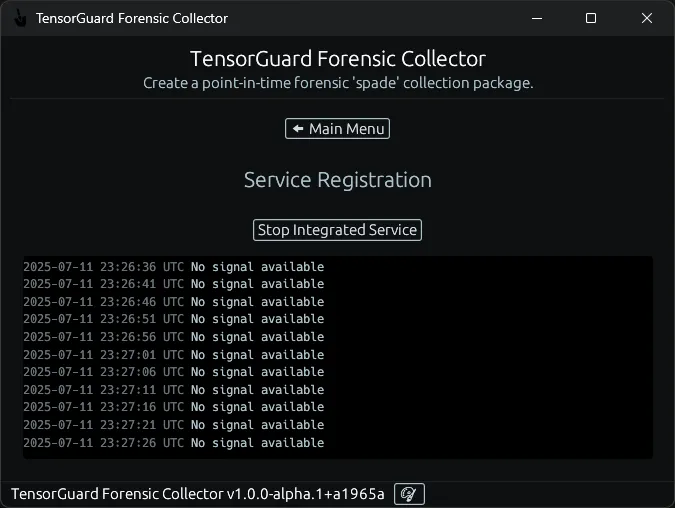
- Paste in your enrollment key. Select “Install Service” to install the service agent to this device until uninstalled (this will launch the TensorGuardForensicCollector service on device startup). You will need to use this program again to uninstall the service. Alternatively, select “Run Integrated Service” to only run this service while the GUI program is running. Once you close this program, the device will no longer be accessible from the TensorGuard Console.
Service Installation:
Integrated Service:
Command Line Interface (CLI)
Section titled “Command Line Interface (CLI)”- From the case menu, select the “New Enrollment” tool in the “Enrolled Devices” table.
- Copy the “Enrollment Key” and select close. This will only be shown once. The enrollment key is required on the device to register it to your case.
- Click “Download Windows Collector” or “Download Linux Collector” based on the target device that you want to register. These same downloads are linked here: Downloads.
- Execute the collector program on your target device. You can run with
--helpto see the available commands.
> ./TensorGuardForensicCollectorThe TensorGuard Forensic Collector
Usage: TensorGuardForensicCollector.exe [COMMAND]
Commands:  collect    Create a point-in-time forensic 'spade' collection package  service    Run the collector in service mode  install    Install the collector in service mode  uninstall  Uninstall the collector service  help       Print this message or the help of the given subcommand(s)
Options: -h, --help Print help -V, --version Print version> sudo ./TensorGuardForensicCollectorThe TensorGuard Forensic Collector
Usage: TensorGuardForensicCollector.exe [COMMAND]
Commands: collect Create a point-in-time forensic 'spade' collection package service Run the collector in service mode install Install the collector in service mode uninstall Uninstall the collector service help Print this message or the help of the given subcommand(s)
Options: -h, --help Print help -V, --version Print version- To install the service, in most cases, run the following command with your enrollment key:
> ./TensorGuardForensicCollector install --token <your_enrollment_key>> sudo ./TensorGuardForensicCollector install --token <your_enrollment_key>You can view additional options for the install command with --help:
> ./TensorGuardForensicCollector install --helpInstall the collector in service mode
Usage: TensorGuardForensicCollector.exe install --token <TOKEN>
Options: -t, --token <TOKEN> Install in service mode -h, --help Print help -V, --version Print version> sudo ./TensorGuardForensicCollector install --helpInstall the collector in service mode
Usage: TensorGuardForensicCollector.exe install --token <TOKEN>
Options: -t, --token <TOKEN> Install in service mode -h, --help Print help -V, --version Print versionYou can later uninstall the service via:
> ./TensorGuardForensicCollector uninstall> sudo ./TensorGuardForensicCollector uninstallYou can view additional options for the uninstall command with --help:
> ./TensorGuardForensicCollector uninstall --helpUninstall the collector service
Usage: TensorGuardForensicCollector.exe uninstall
Options: -h, --help Print help -V, --version Print version> sudo ./TensorGuardForensicCollector uninstall --helpUninstall the collector service
Usage: TensorGuardForensicCollector.exe uninstall
Options: -h, --help Print help -V, --version Print versionAlternatively to run the integrated service, in most cases, run the following command with your enrollment key:
> ./TensorGuardForensicCollector service --token <your_enrollment_key>> sudo ./TensorGuardForensicCollector service --token <your_enrollment_key>You can view additional options for the service command with --help:
> ./TensorGuardForensicCollector service --helpRun the collector in service mode
Usage: TensorGuardForensicCollector.exe service [OPTIONS] --token <TOKEN>
Options: -t, --token <TOKEN> Run in service mode, by command line -n, --non-interactive Exec via service manager [DO NOT USE] -e, --endpoint <ENDPOINT> Change the backend endpoint [DO NOT USE] -h, --help Print help -V, --version Print version> sudo ./TensorGuardForensicCollector service --helpRun the collector in service mode
Usage: TensorGuardForensicCollector.exe service [OPTIONS] --token <TOKEN>
Options: -t, --token <TOKEN> Run in service mode, by command line -n, --non-interactive Exec via service manager [DO NOT USE] -e, --endpoint <ENDPOINT> Change the backend endpoint [DO NOT USE] -h, --help Print help -V, --version Print versionTriggering a Collection and Report
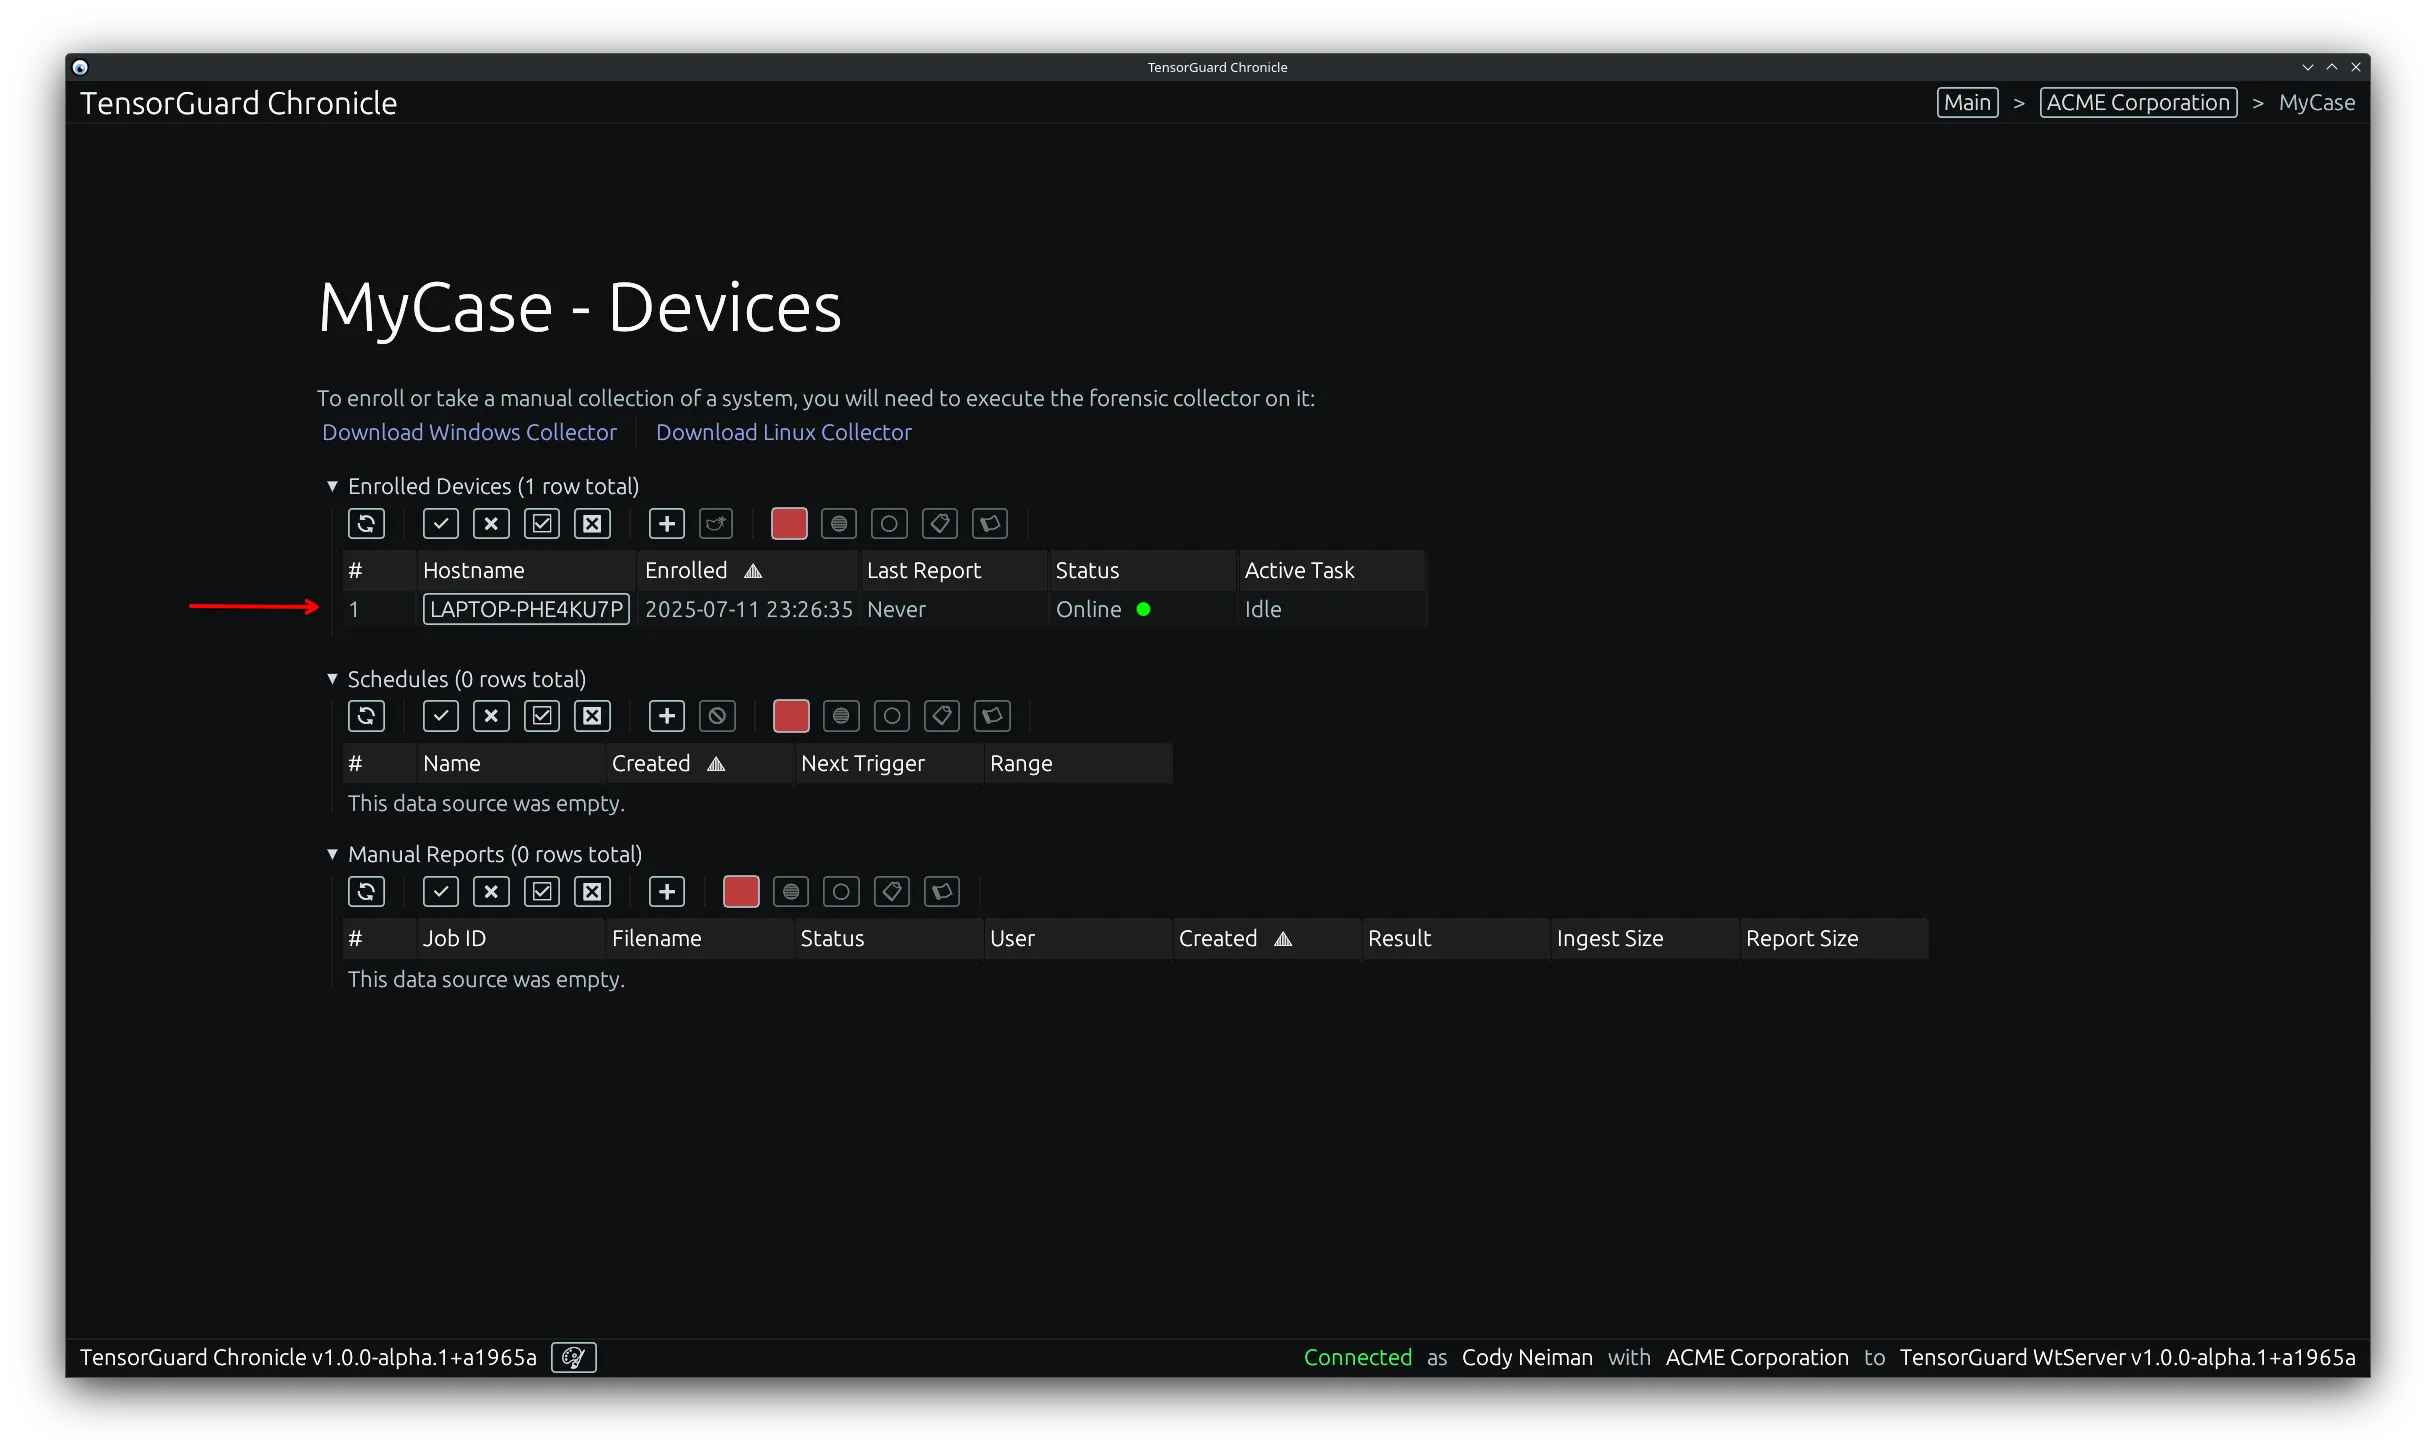
Section titled “Triggering a Collection and Report”- Back in the TensorGuard Console’s Case view, you should now see your device listed in the “Enrolled Devices” table. From here you can trigger a report for a single device, or multiple devices at once.
For a Single Device
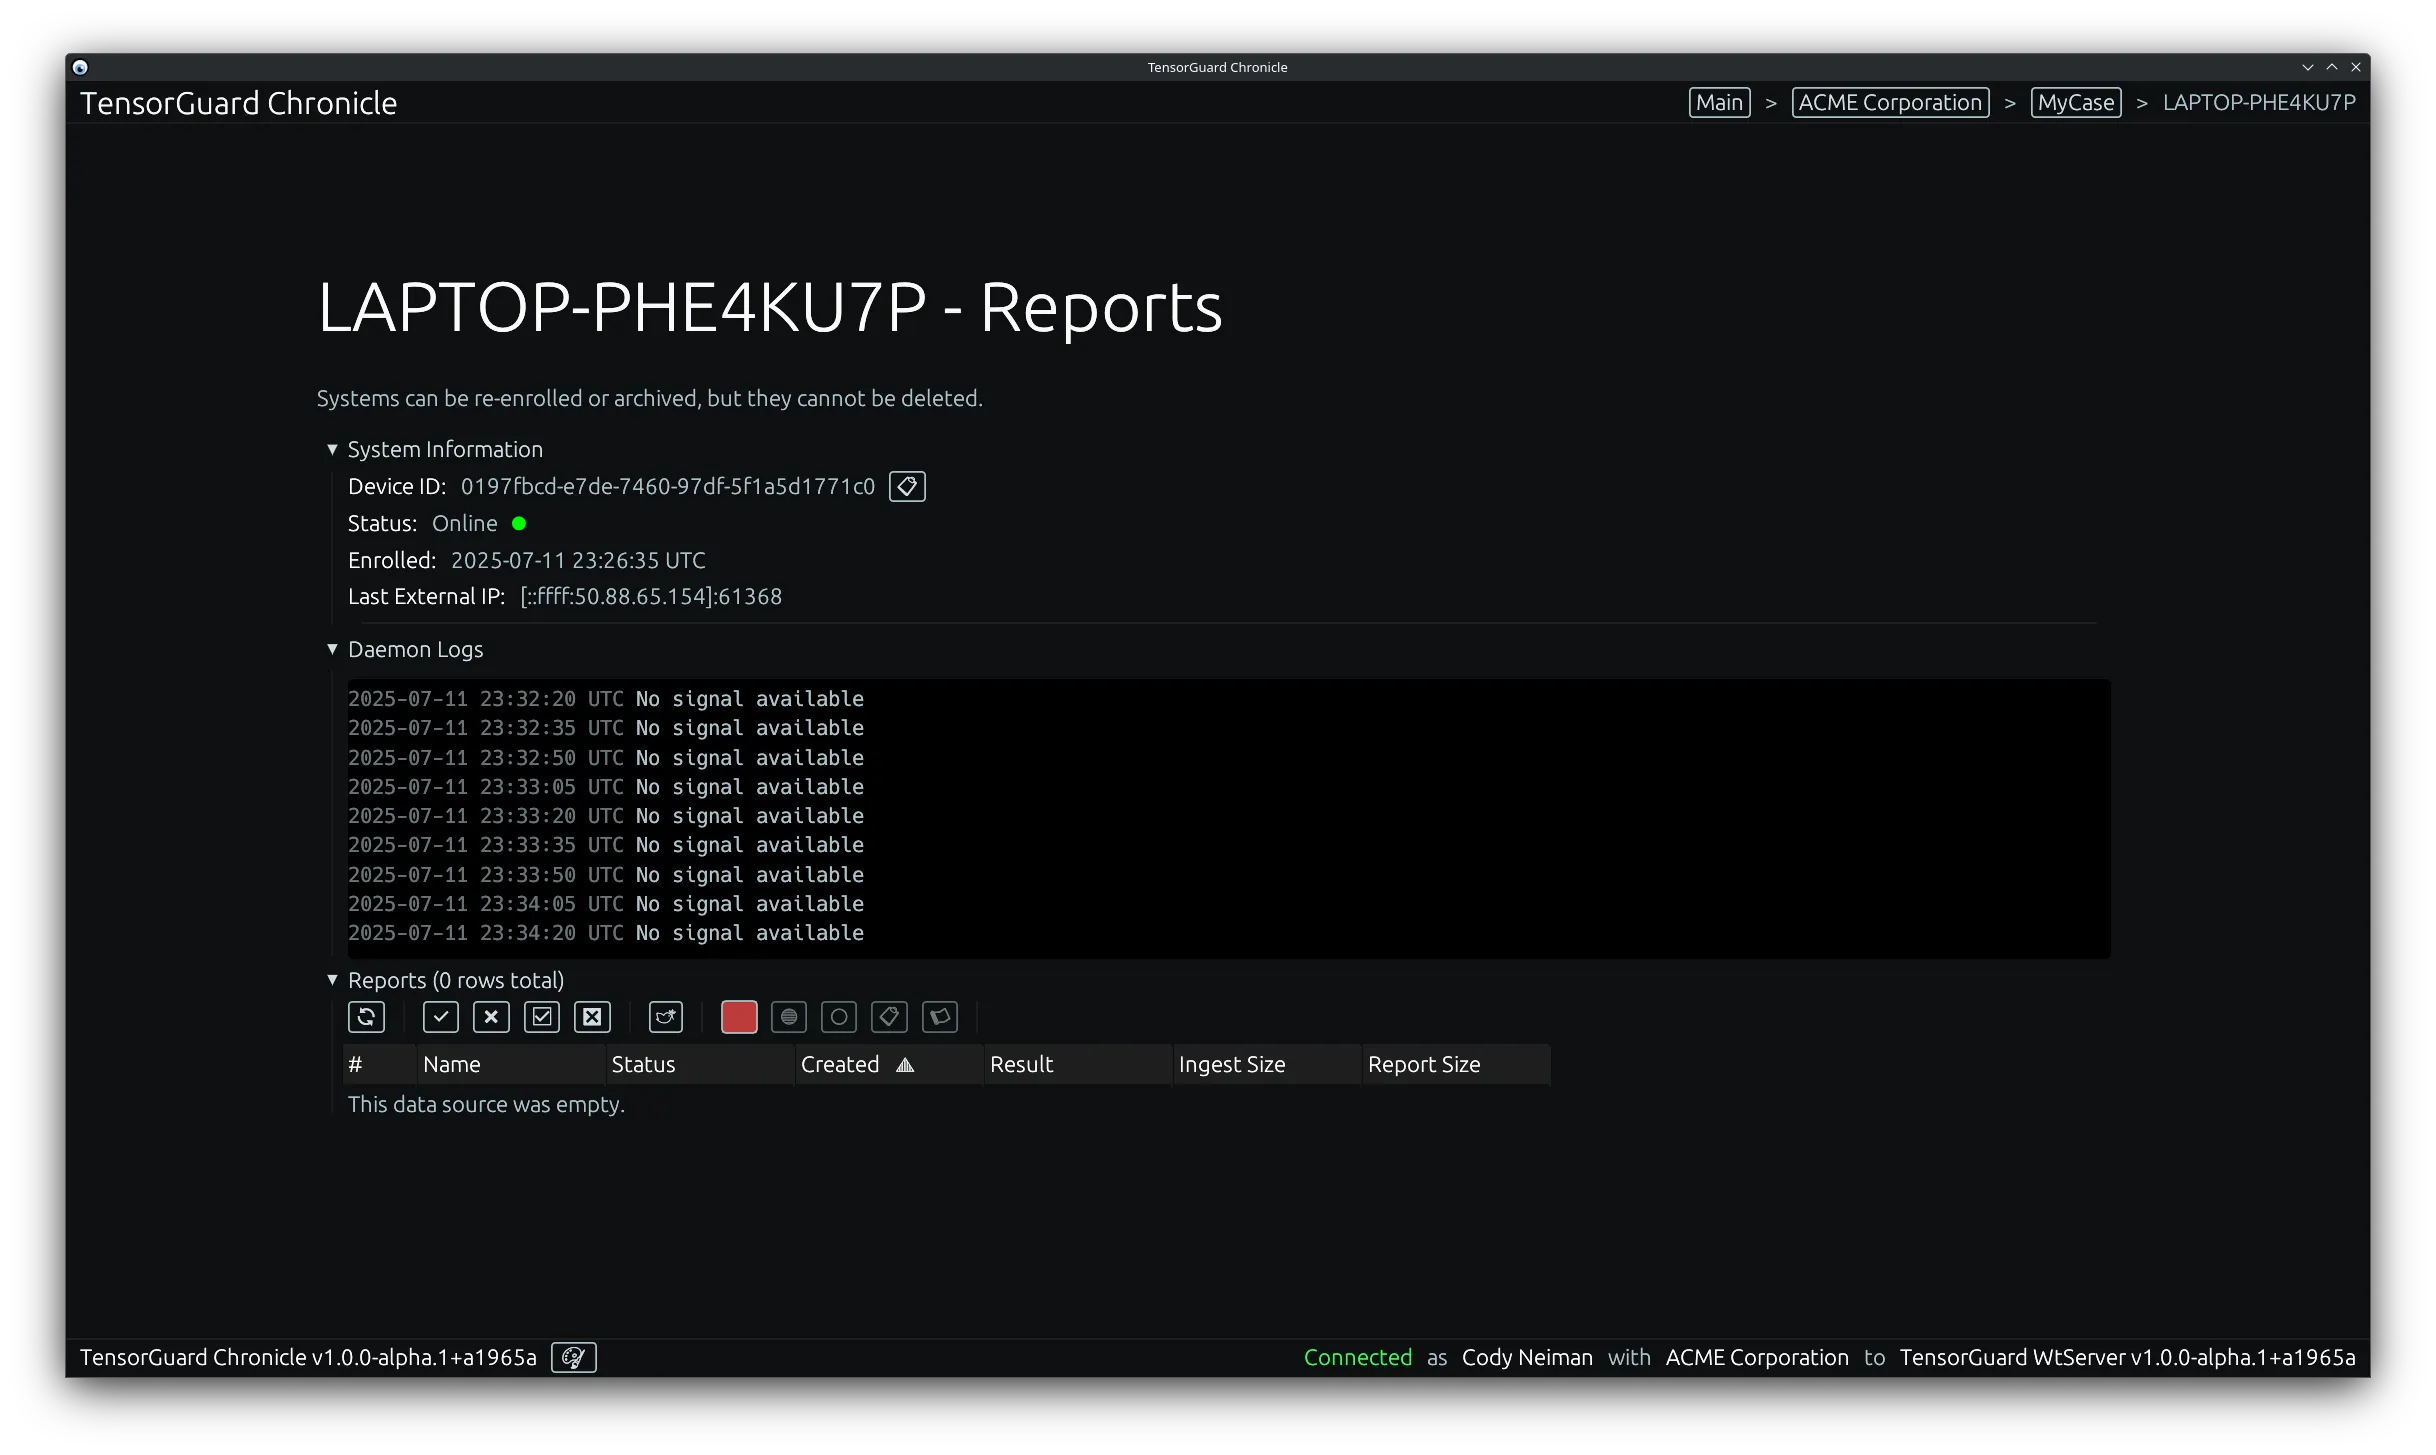
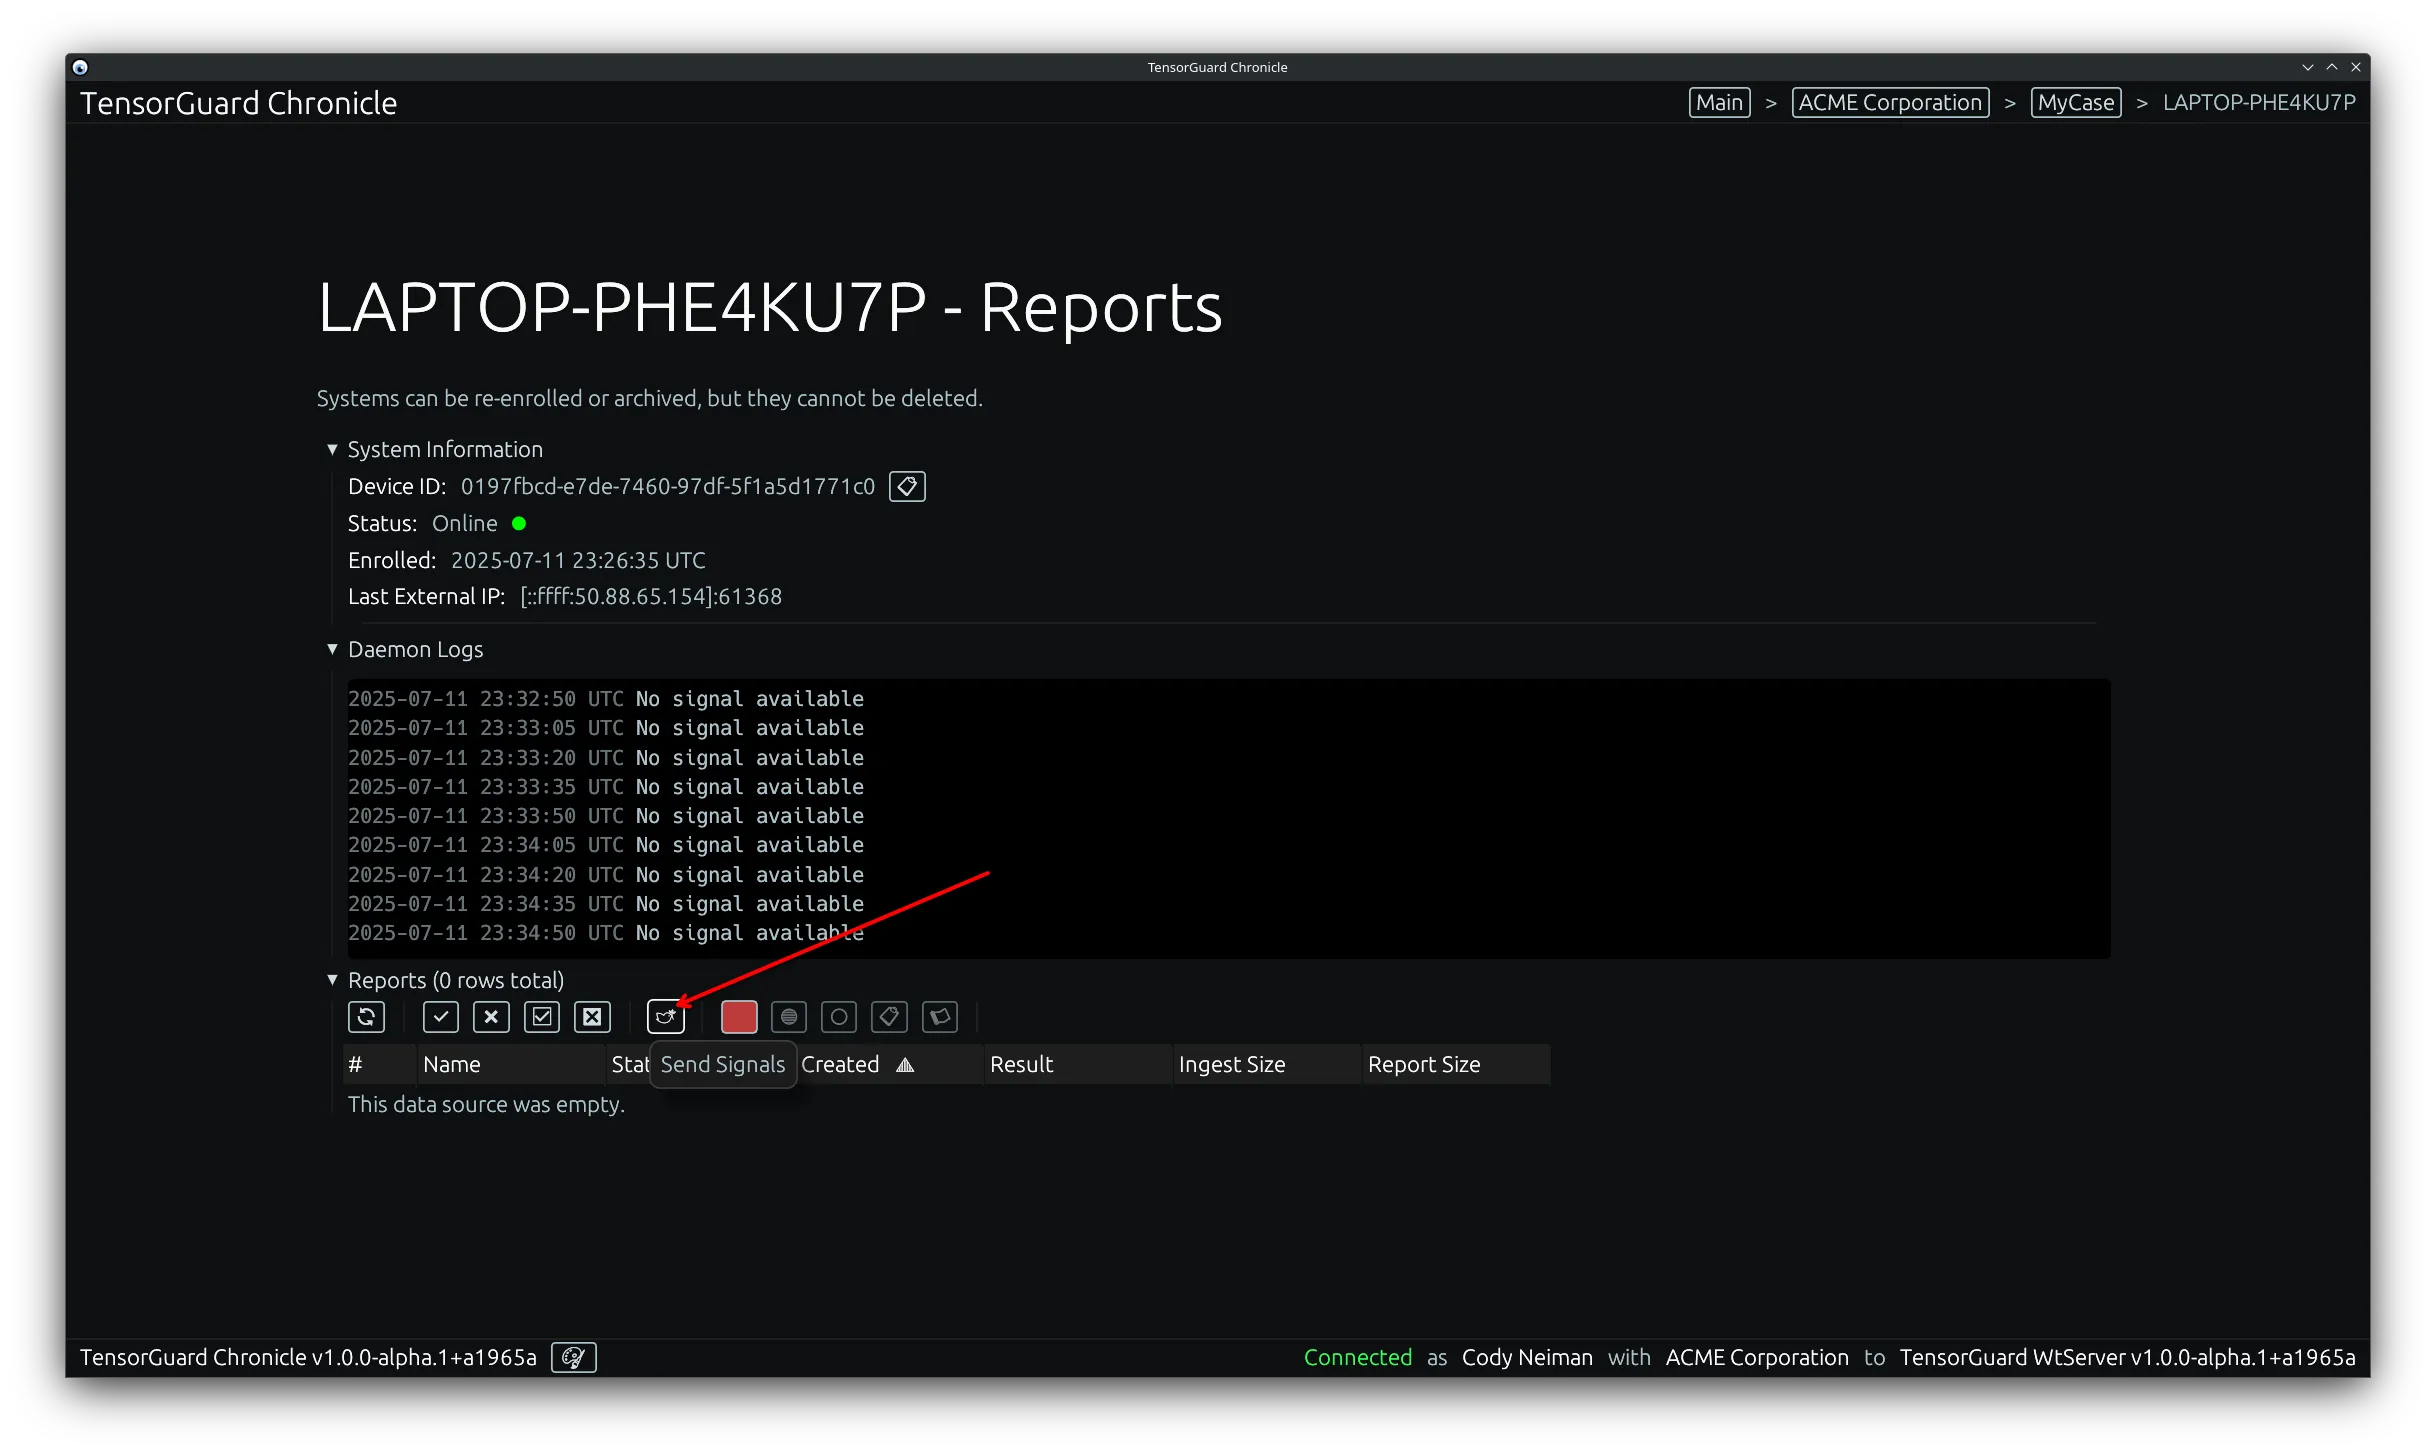
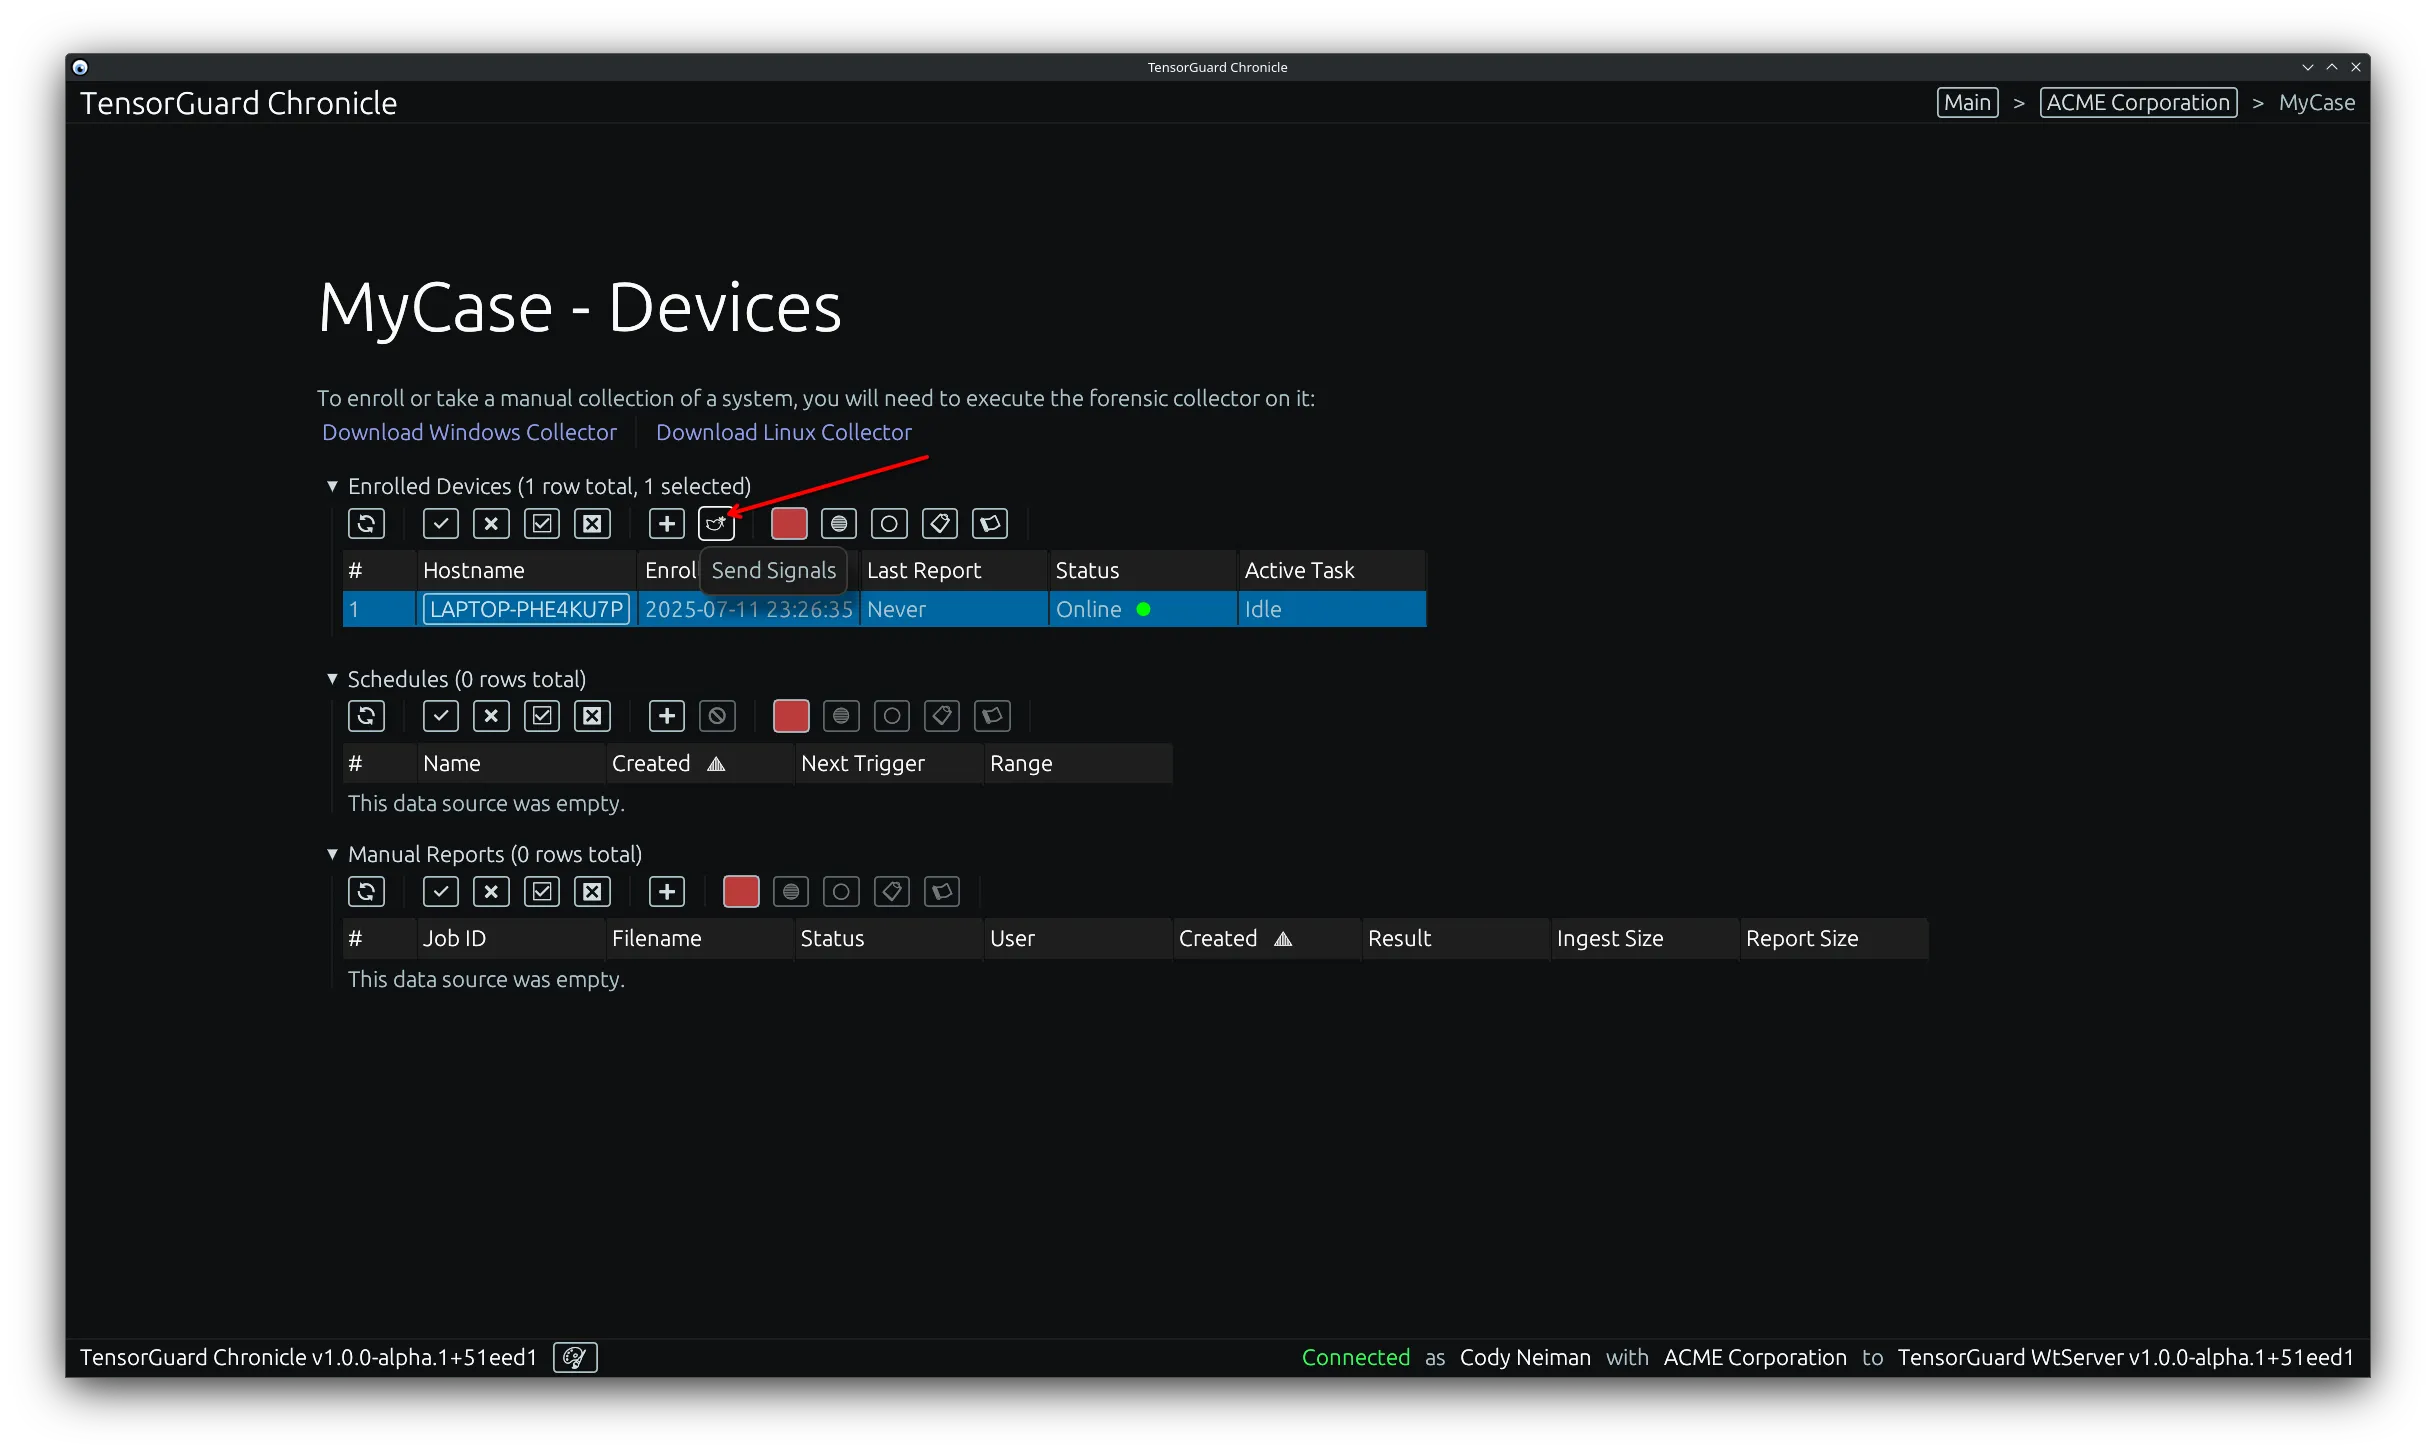
Section titled “For a Single Device”- Click on a device hostname to be led to the device view. From here you can view system information, daemon logs for the system, and a reports table.
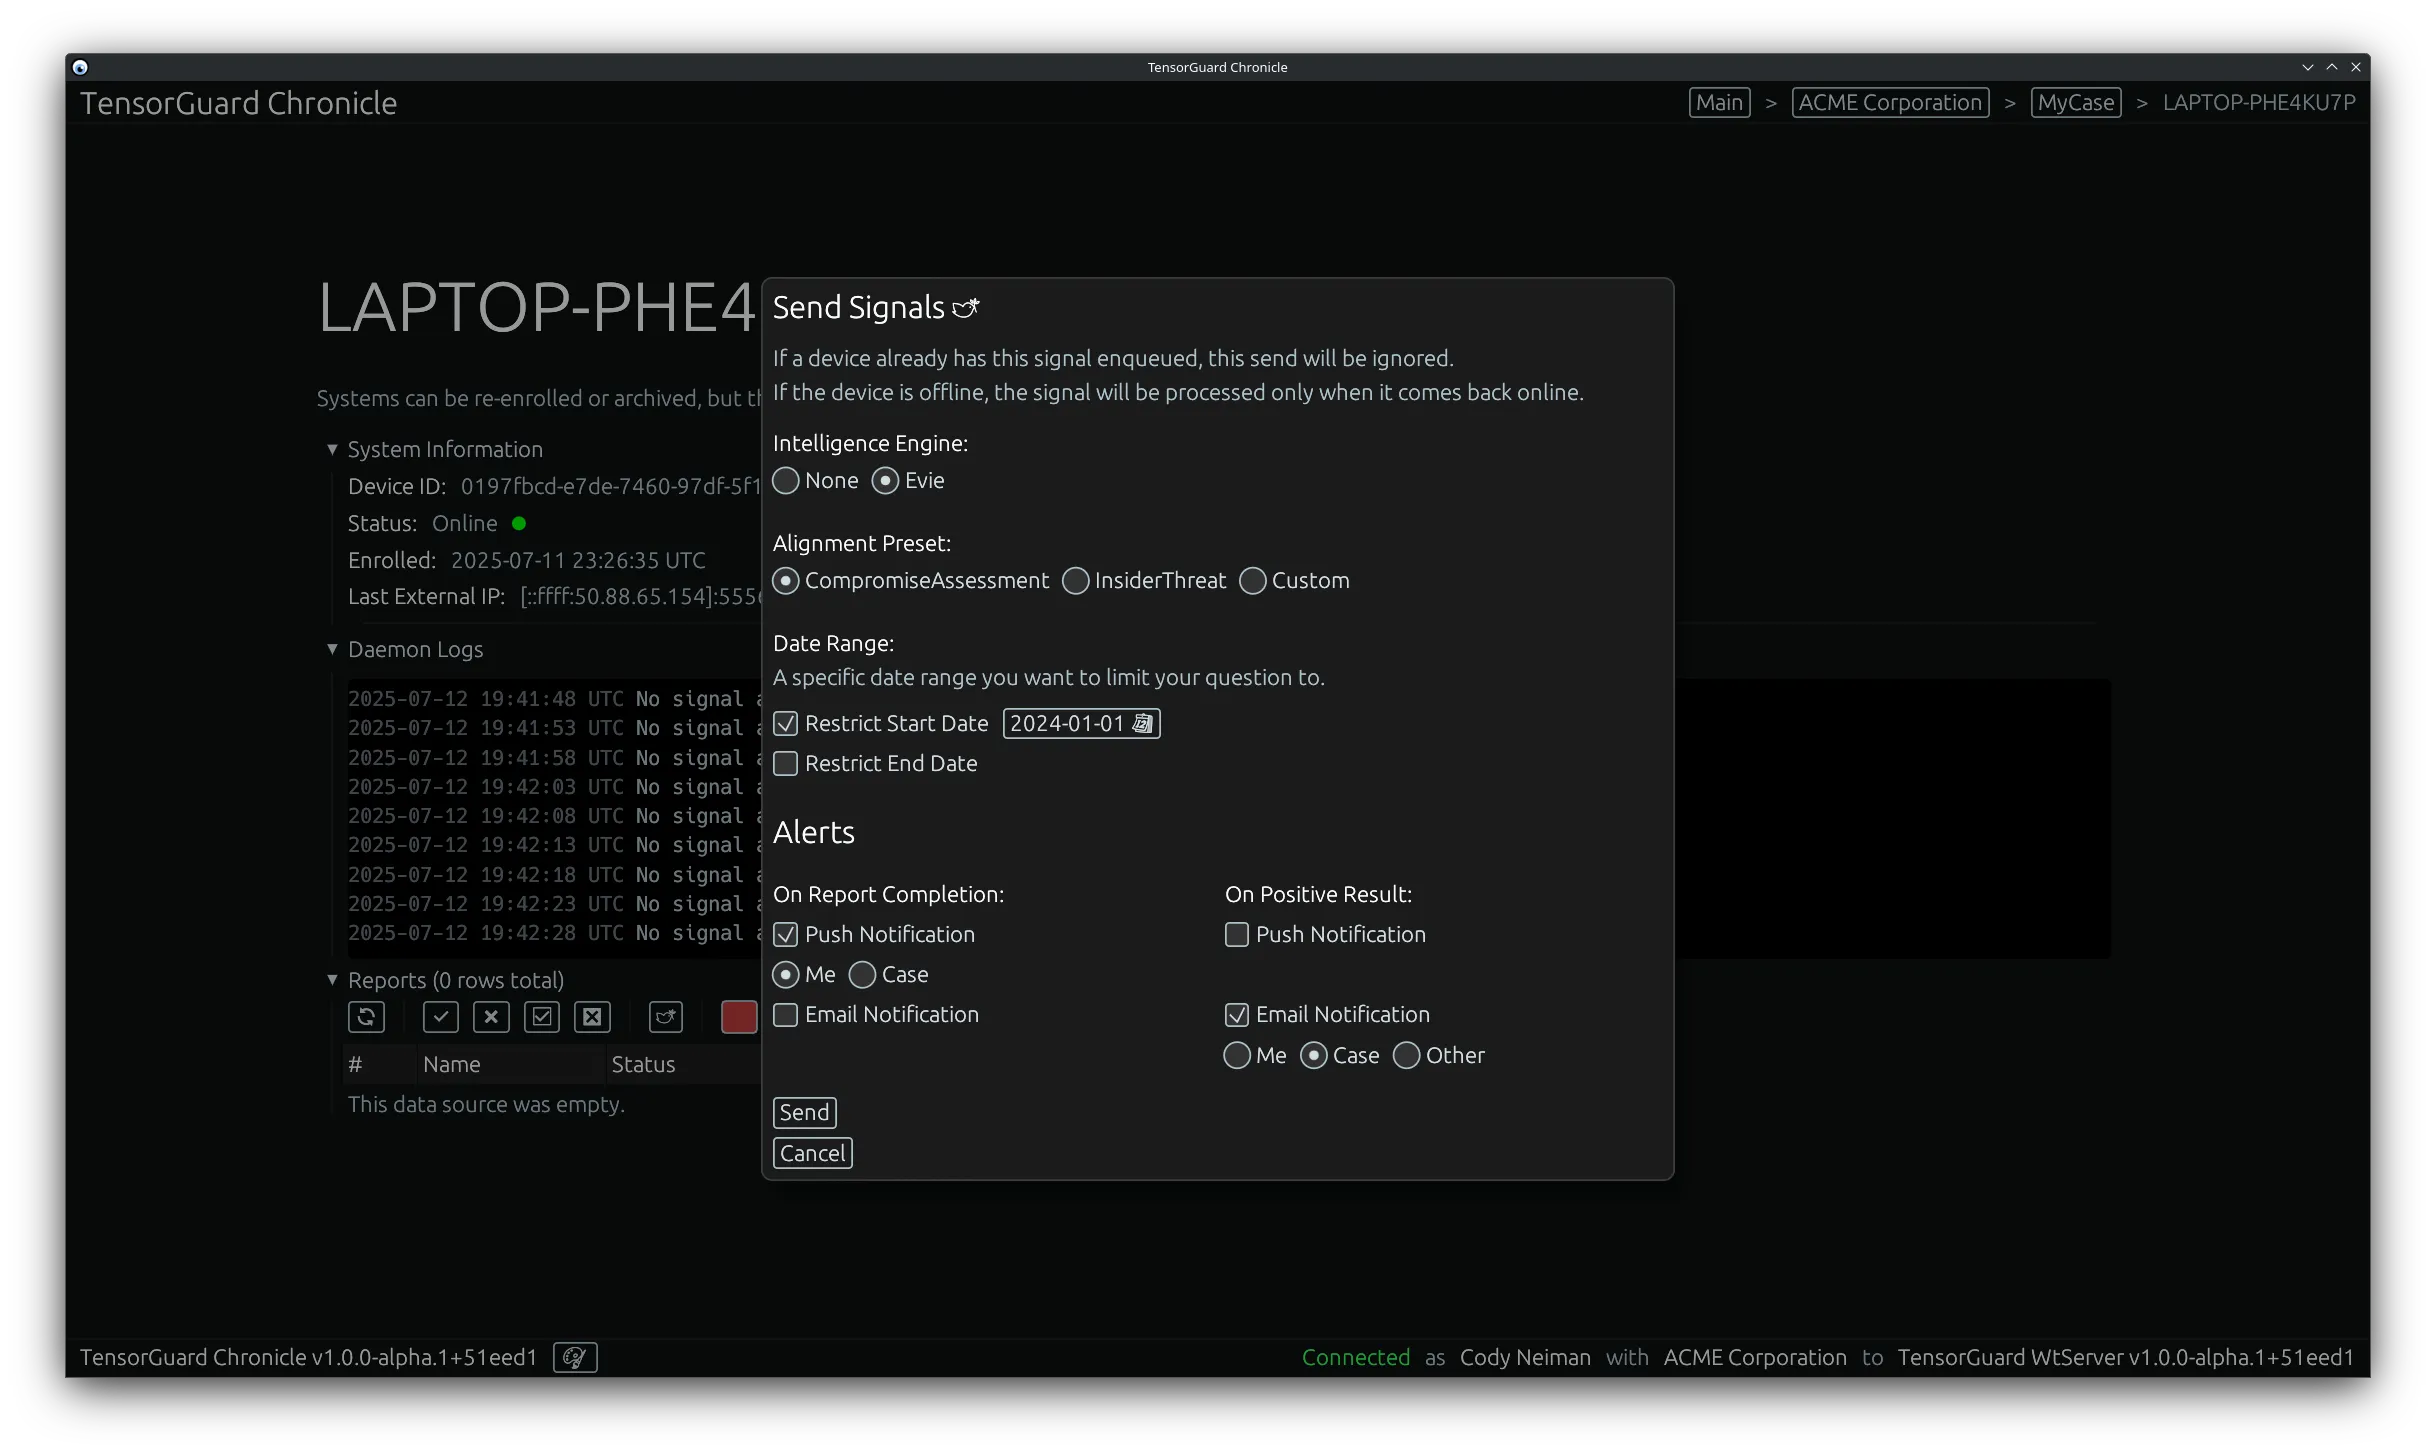
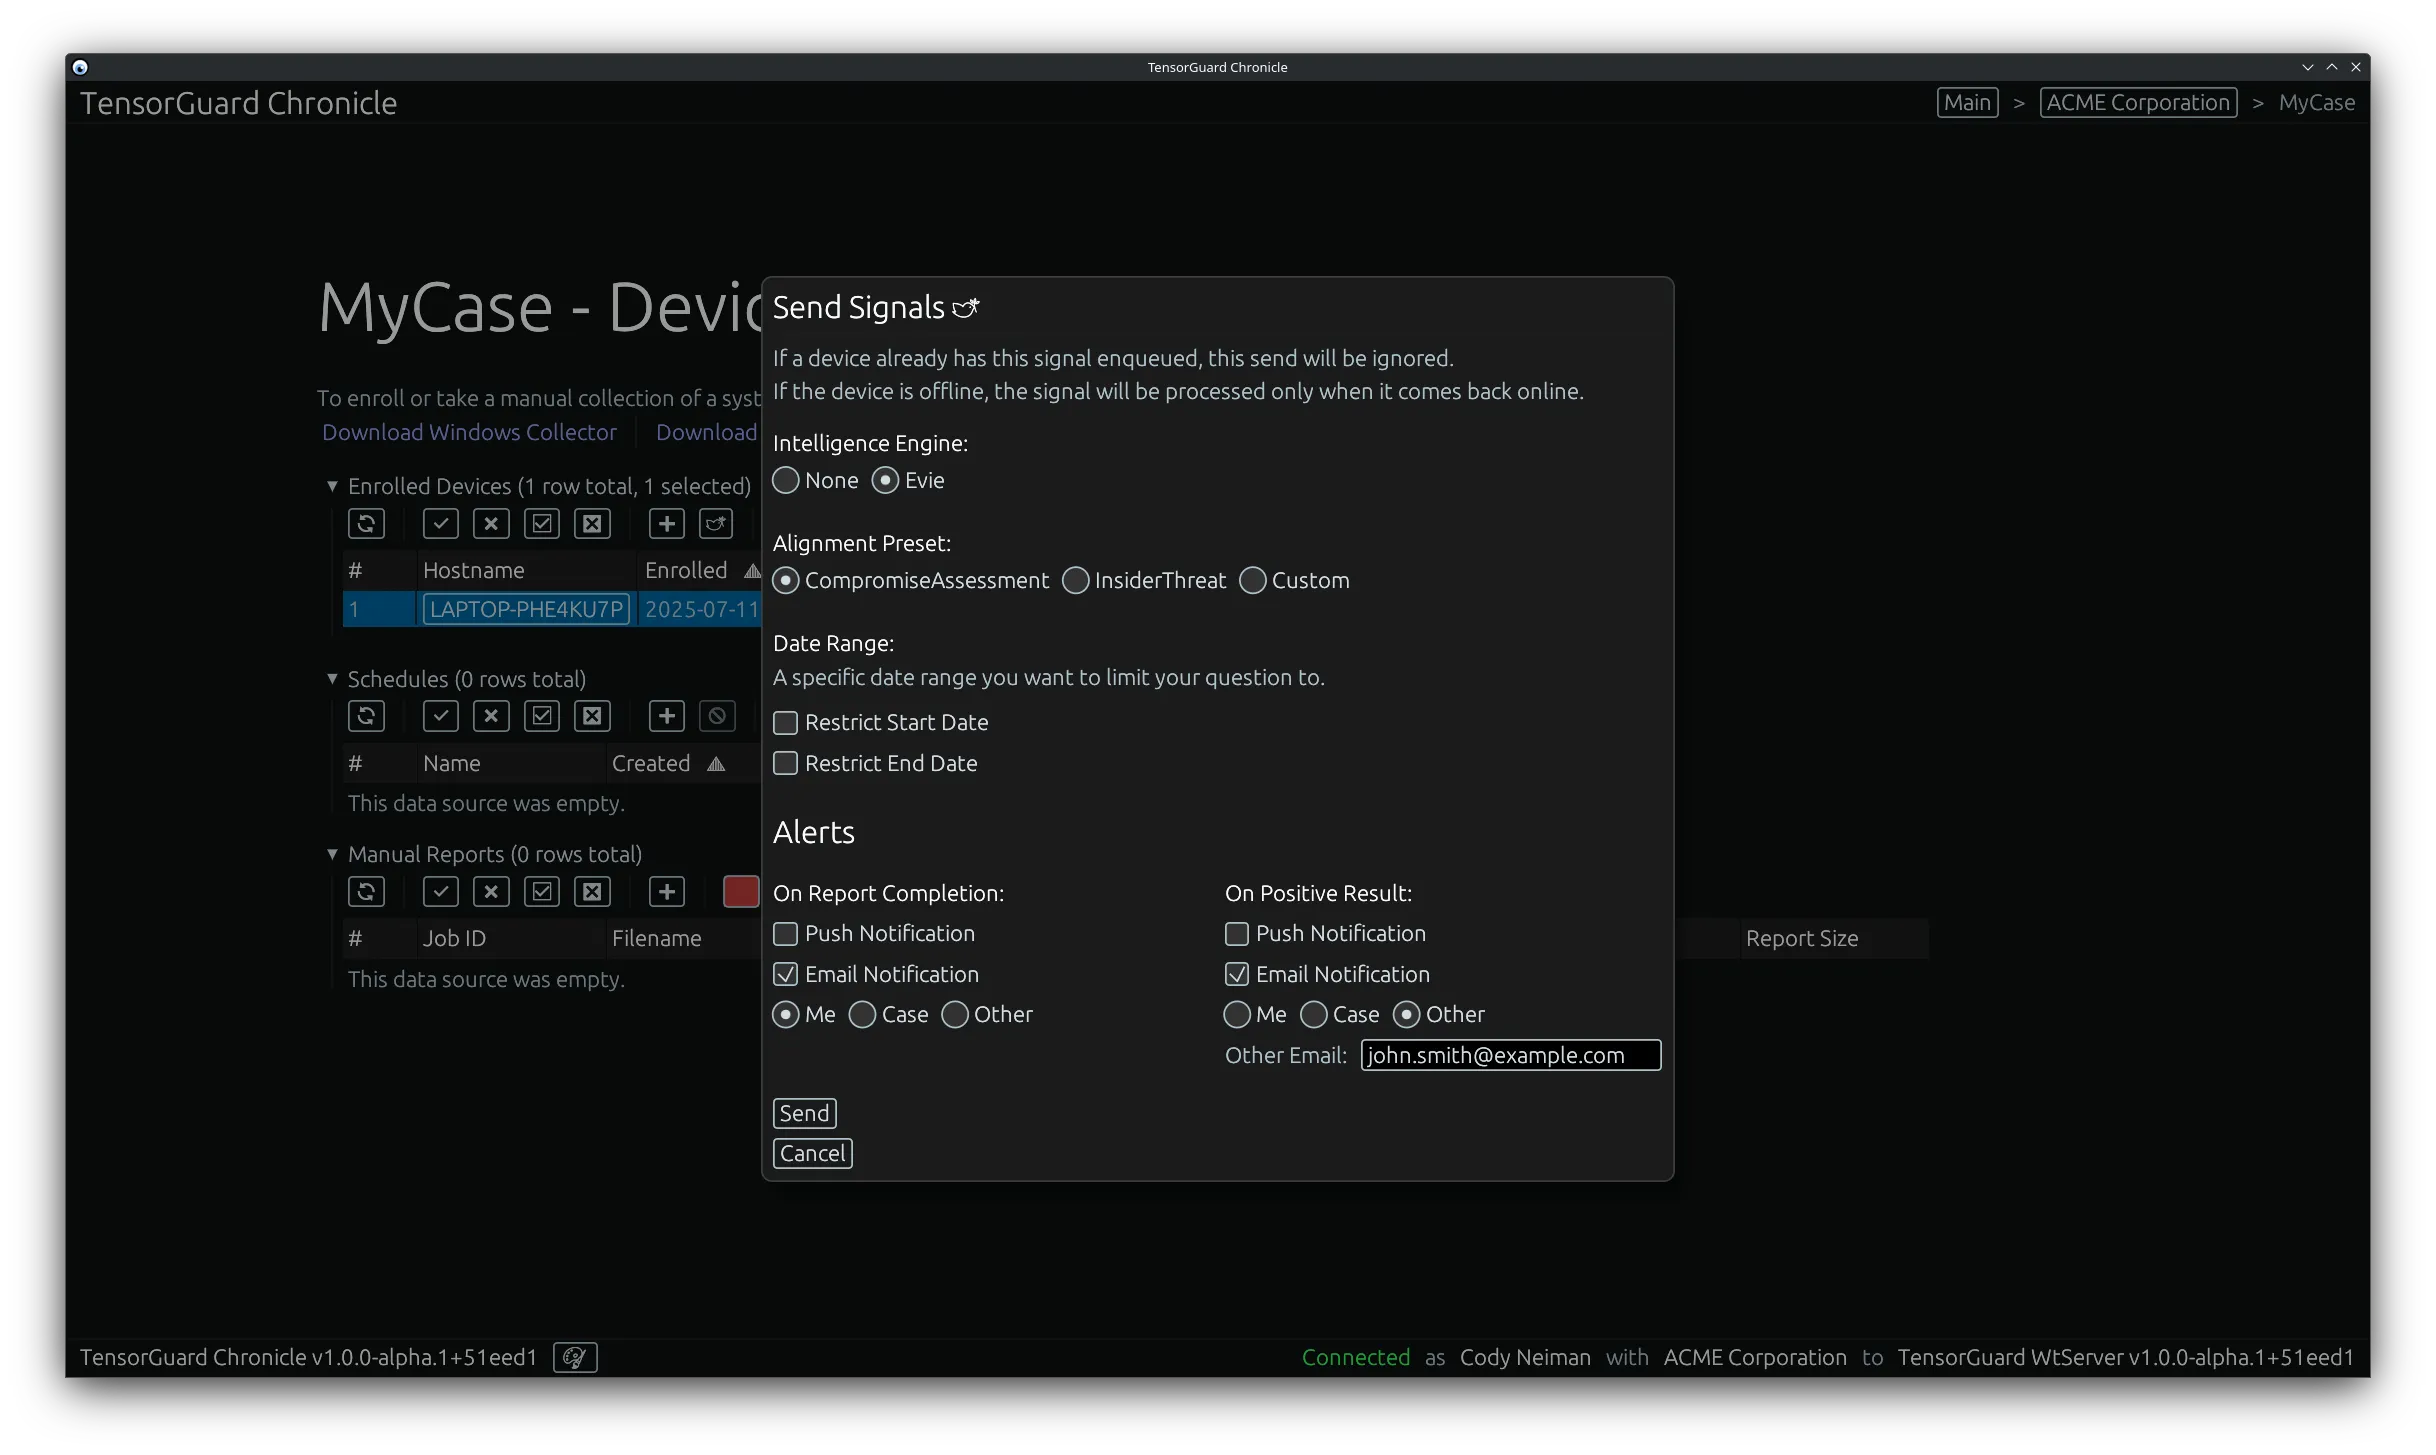
- You can click on this “Send Signals” tool to trigger a new collection for this device.
- From this menu you can configure the TensorGuard Intelligence Engine to process the collection, including None. None will generate a report with the raw forensic evidence, while the other options will generate a report with additional analysis and findings. After that, you can configure the alerts section to send push or email notifications based on the completion and results of the report.
For Multiple Devices
Section titled “For Multiple Devices”- Select multiple devices from the “Enrolled Devices” table by clicking the rows or using the filter and select all/filtered tools. Once you have your range selected, click the “Send Signals” tool.
- From this menu you can configure the TensorGuard Intelligence Engine to process the collection, including None. None will generate a report with the raw forensic evidence, while the other options will generate a report with additional analysis and findings. After that, you can configure the alerts section to send push or email notifications based on the completion and results of the report.
Manual Collection
Section titled “Manual Collection”Taking a Collection
Section titled “Taking a Collection”Graphical User Interface (GUI)
Section titled “Graphical User Interface (GUI)”- Click “Download Windows Collector” or “Download Linux Collector” based on the target device that you want to register. These same downloads are linked here: Downloads.
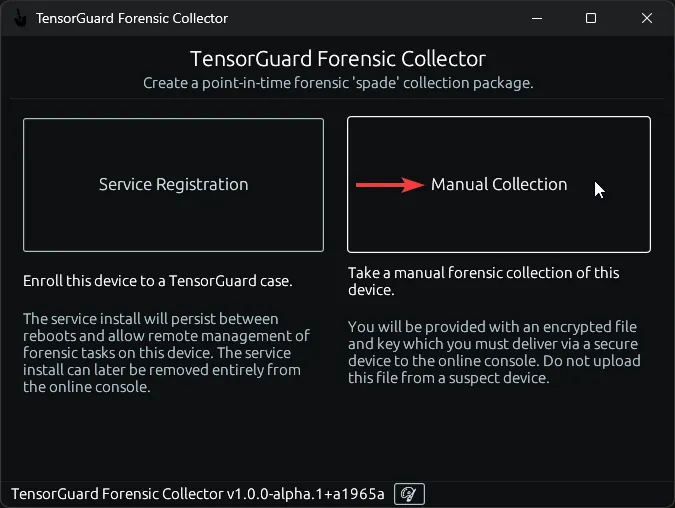
- Execute the collector program on your target device. Choose “Manual Collection”. You must run it as administrator on Windows, or a sudo-user on Linux.
- Select a Save Path, and click start to begin the Forensic Collection. This process may take up to ~15 minutes for devices with heavy usage patterns.
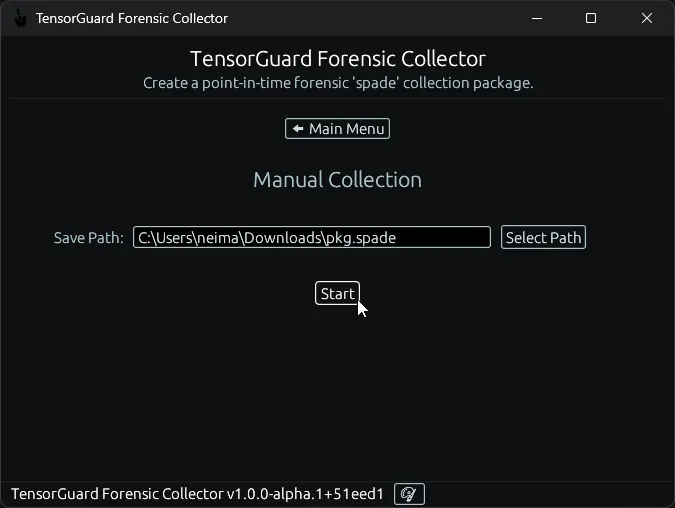
- Wait for the forensic collection to complete.
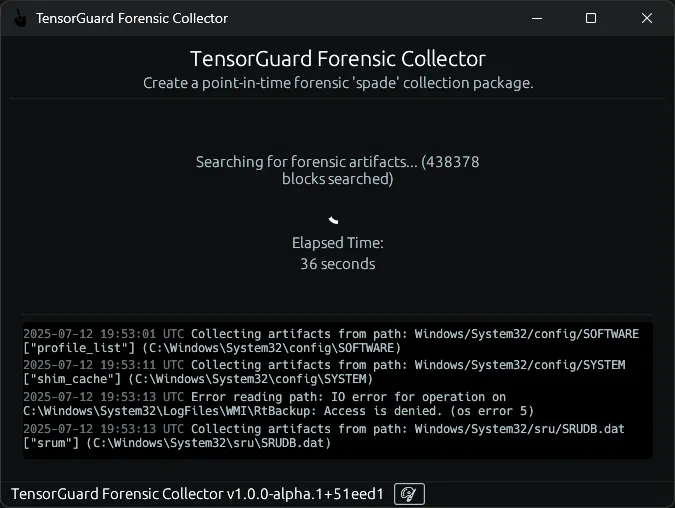
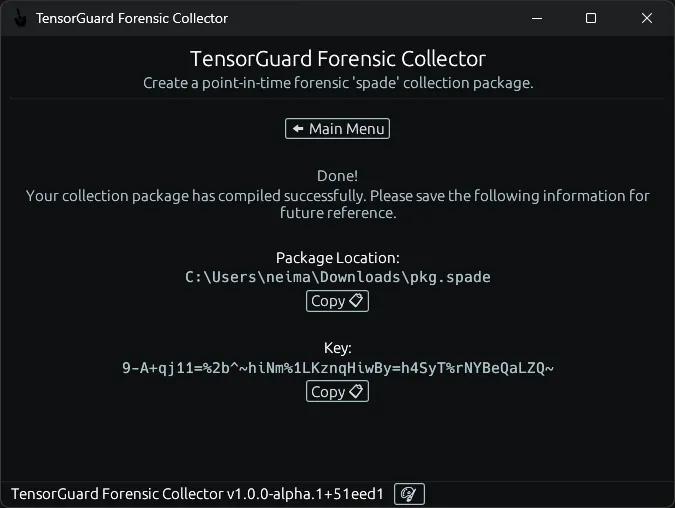
- Note the forensic package’s written location and save the key which was used to encrypt the package. You will need this key to generate a report later.
Command Line Interface (CLI)
Section titled “Command Line Interface (CLI)”- Click “Download Windows Collector” or “Download Linux Collector” based on the target device that you want to register. These same downloads are linked here: Downloads.
- Execute the collector program on your target device. You can run with
--helpto see the available commands.
> ./TensorGuardForensicCollector --helpThe TensorGuard Forensic Collector
Usage: TensorGuardForensicCollector.exe [COMMAND]
Commands:  collect    Create a point-in-time forensic 'spade' collection package  service    Run the collector in service mode  install    Install the collector in service mode  uninstall  Uninstall the collector service  help       Print this message or the help of the given subcommand(s)
Options: -h, --help Print help -V, --version Print version> sudo ./TensorGuardForensicCollector --helpThe TensorGuard Forensic Collector
Usage: TensorGuardForensicCollector.exe [COMMAND]
Commands: collect Create a point-in-time forensic 'spade' collection package service Run the collector in service mode install Install the collector in service mode uninstall Uninstall the collector service help Print this message or the help of the given subcommand(s)
Options: -h, --help Print help -V, --version Print version- To take a manual collection, in most cases run the following command:
> ./TensorGuardForensicCollector collect> ./TensorGuardForensicCollector collectYou can view additional options for the collect command with --help:
> ./TensorGuardForensicCollector collect --helpCreate a point-in-time forensic 'spade' collection package
Usage: TensorGuardForensicCollector.exe collect [OPTIONS]
Options: -s, --save-path <SAVE_PATH> Save path for the generated package [default: ./pkg.spade] -r, --root-path <ROOT_PATH> Change the root input path for the collection (not recommended) -f, --filter <FILTER> Limit the collection to a specific set of forensic artifacts (not recommended) -k, --key <KEY> Override the generated key with your own (not recommended) -h, --help Print help -V, --version Print version> sudo ./TensorGuardForensicCollector collect --helpCreate a point-in-time forensic 'spade' collection package
Usage: TensorGuardForensicCollector.exe collect [OPTIONS]
Options: -s, --save-path <SAVE_PATH> Save path for the generated package [default: ./pkg.spade] -r, --root-path <ROOT_PATH> Change the root input path for the collection (not recommended) -f, --filter <FILTER> Limit the collection to a specific set of forensic artifacts (not recommended) -k, --key <KEY> Override the generated key with your own (not recommended) -h, --help Print help -V, --version Print version